
Painting with messy supplies can feel chaotic, but a smart apron can make it calm. The best part is that brush pockets can be both practical and totally artistic.
1. Pocketed Apron With Side Paintbrush Tubes

Imagine two long, fabric “tubes” on the sides that cradle brushes like they’re in tiny sleeves. You can thread in dowel-stiffened edges so the pockets keep their shape while you work.
Use a sturdy canvas or denim so the pockets don’t sag when you load them with brushes. Add a top flap with a snap so tips stay covered and bristles don’t smear paint. For personalization, sew your initials on the flap and choose contrast thread to match your studio color scheme.
2. Patchwork Apron With Paintbrush Pocket Slats
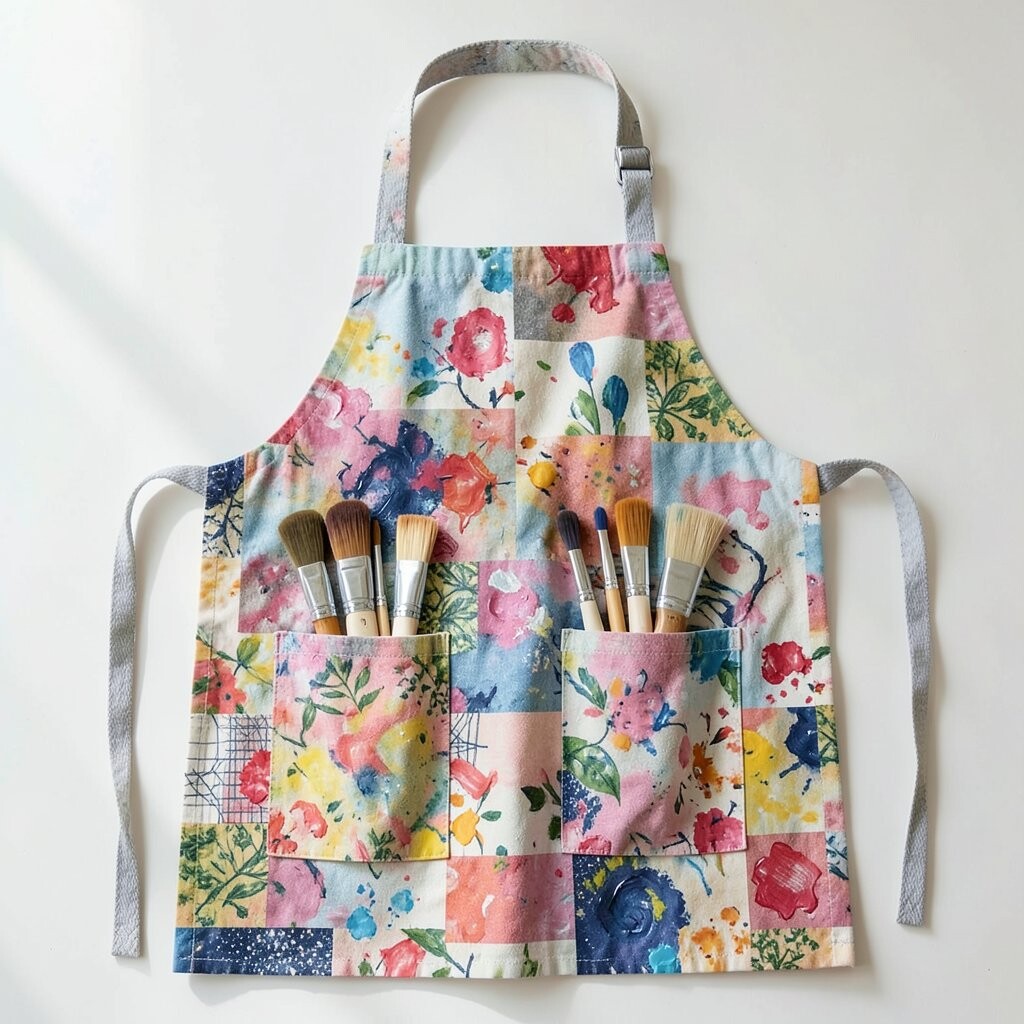
A patchwork apron looks like wearable scrap art, and brush pockets can fit right into the design. Think of pocket “slats” spaced like windowpanes, each holding a different brush size.
Choose fabrics with fun prints like stripes, polka dots, or vintage florals so every pocket feels intentional. Keep the pocket openings slightly angled so you can grab a brush quickly without dumping others. Add a small label tag under each slat, such as “thin,” “wide,” or “detail,” to help you stay organized.
When it comes to cost, hunt for leftover fabric fat quarters or repurpose old shirts. This idea is also trendy because makers love upcycling and color blocking in modern craft spaces.
3. Adjustable Overalls-Style Apron With Front Brush Pockets

This apron idea borrows the cozy fit of overalls, with brush pockets built into the front panels. The straps can be adjustable, which helps the pockets sit at the right height for your hands.
Place two or three vertical brush pockets along the main panel, then add a wider pocket near the bottom for extra tools. Stitch a non-slip lining so brushes stay put when you lean over your canvas. Add a pencil pocket beside the brush sections so you can mark outlines without hunting.
To keep it practical, reinforce pocket seams with double stitching and a small bar tack at the stress points. For personalization, paint a little palette icon on one strap and use matching fabric paint for a homemade studio vibe.
Cost-wise, you may spend a bit more on hardware like buckles, but overall fabric costs stay manageable. A similar “workwear” look is popular right now in art communities because it feels durable and friendly.
4. Minimalist Apron With One Statement Brush Pocket

Sometimes one great pocket beats a bunch of smaller ones, especially if you prefer a clean look. Center a single wide brush pocket on the chest and line it with a bright color you’ll love seeing while you paint.
Use a flap closure made from felt or faux leather so the opening stays neat and you can wipe drips easily. If you like color variety, choose a pocket flap pattern like tiny dots or subtle marbling. This is an easy personalization win because you can swap the flap fabric whenever you want a new mood.
5. Denim Apron With Hanging Brush Pouch and Quick-Grab Flap

Denim is tough, and a hanging pouch can hold brushes securely while you move around your space. The quick-grab flap helps you pull a brush fast, which is great for outdoor painting or live demos.
Design the pouch so it’s deeper at the top and slightly narrower at the bottom, creating a snug hold without bending bristles. Add a small loop-and-button closure so the flap stays closed even if you’re busy cleaning up. For personalization, stitch a stitched-on “paint trail” design across the flap edges using contrasting thread.
Expect moderate cost since denim can be pricier than thin cotton, but thrifted jeans reduce the expense fast. Current trend energy comes from “utility fashion,” where functional items look stylish instead of plain.
6. Ribbon-Bound Pocket Divider Apron

This idea uses ribbon-bound edges to divide a long brush pocket into neat sections. The ribbon creates crisp lines, so your brushes look tidy even when the apron is messy from use.
Start by sketching a simple grid on the pocket front, then stitch dividers inside and cover the seams with decorative ribbon. Add a fabric lining that wicks away a little moisture, which helps when you’re switching between water-based paints. For practical tips, keep the dividers slightly taller than the longest brush you own.
If you want personalization, use ribbon in your favorite color palette and add a small charm near one corner. Cost is usually low because ribbon is affordable, and you can often find bundles at craft stores or online.
This style feels modern because mixed textures and visible seams are popular in maker circles. Plus, it’s a fun way to learn basic pocket construction without complicated patterns.
7. Paintbrush Pocket With Leather-Look Tip Guards
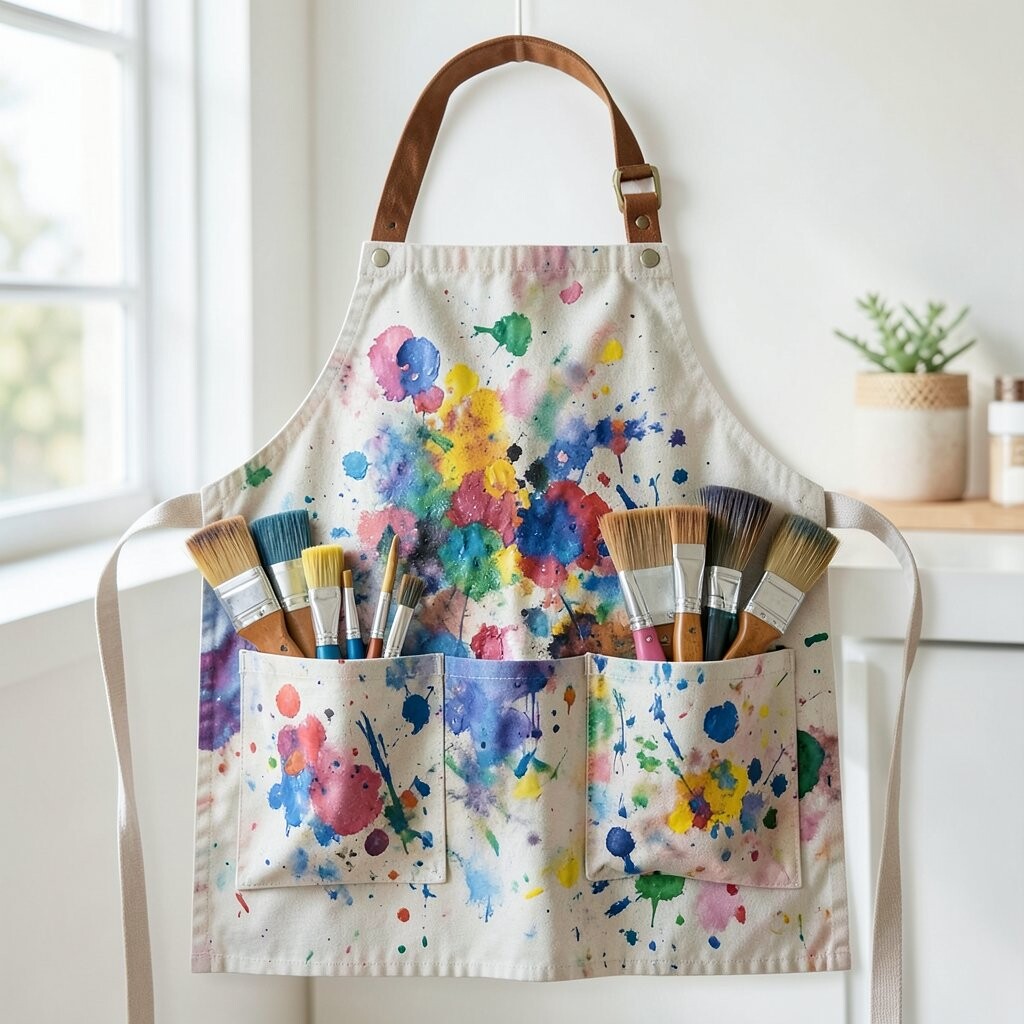
Brush tips can get stained, so building “guards” into the pockets is a smart upgrade. Use a leather-look fabric strip at the bottom of each pocket to protect the lining from drips and worn bristles.
Make each pocket section separate so small brushes don’t collide with bigger ones while you reach. Stitch the tip guard so it extends slightly past the pocket opening, acting like a mini shield. Add a wipe-friendly lining on the inside so you can clean splatters more easily.
For cost considerations, faux leather can raise the price, but it goes a long way and can be cut from small scrap pieces. This option looks great in the “crafted with intention” trend, where even small details feel designer-level.
8. Watercolor-Style Gradient Apron With Color-Coded Brush Pockets

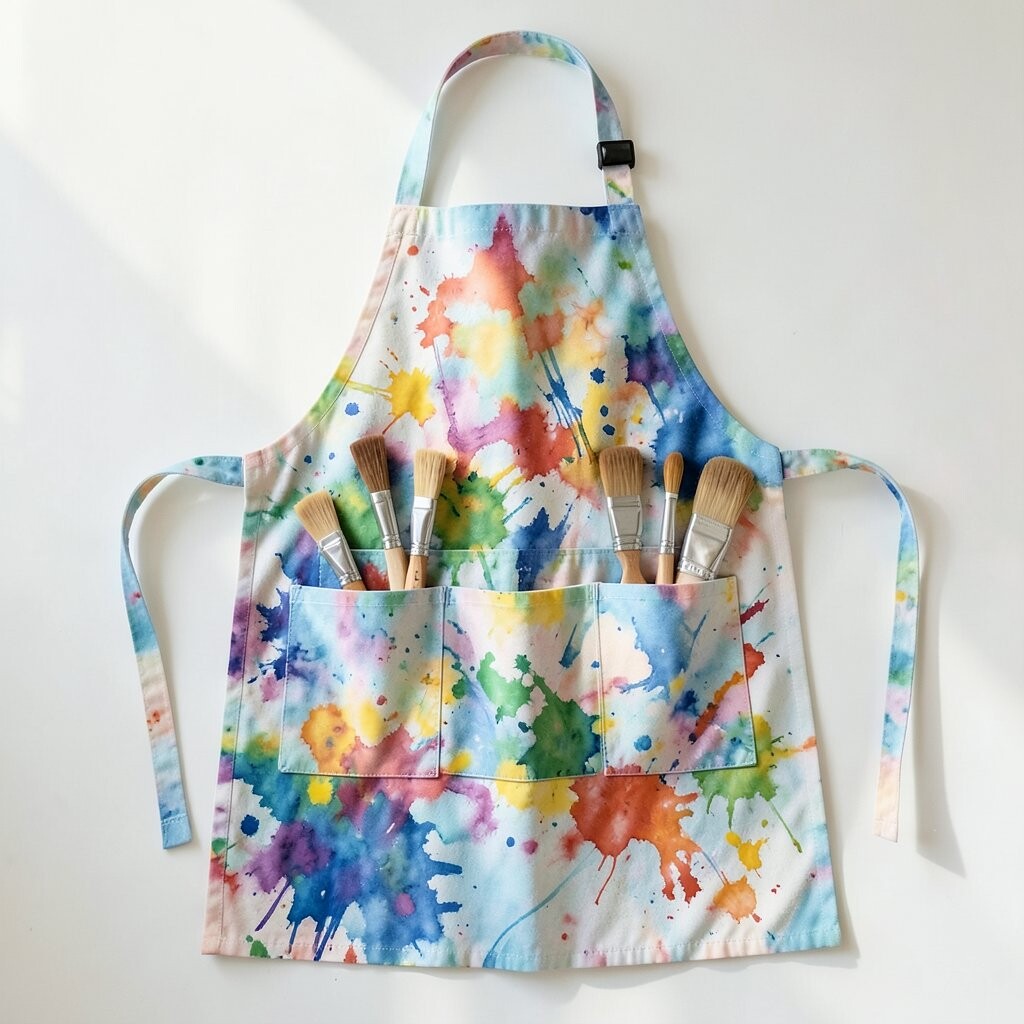
A gradient apron looks like watercolor wash made into clothing, and it pairs perfectly with color-coded brush pockets. Each pocket can be dyed or painted a different shade so you naturally grab the right brush for the right color.
Use fabric-safe dye or paint to fade from light to dark across the apron panels. Then match pocket linings to your most-used pigments, like sunny yellow, leafy green, or deep blue. For practical tips, seal the dye if your fabric paint recommends it so the color doesn’t transfer too easily.
Personalization is simple here because you can follow your own favorite palette and design a “map” of colors across the front. Keep cost in check by using test fabric scraps for gradients before you commit to the main apron.
This idea fits current trends where artists share color-themed tools online. It’s also a friendly way to teach yourself what you reach for, since the pockets act like visual reminders.
9. Scribble-Graph Apron With Brush Storage “Coordinates”

Turn your apron into a mini art planner by using a scribble-graph design. Each brush pocket becomes a coordinate, so grabbing tools feels like following a creative map.
Draw playful axis lines across the front, then sew small pockets at different points like “(x=1)” or “(y=3).” Add a tiny fabric “legend” tag near the top so you remember which pocket holds which brush. For practical tips, keep pocket openings wide enough to reduce brush friction when you’re in a hurry.
To personalize, write fun code words for your brushes, like “sky,” “grass,” or “ink.” Cost stays moderate because you mainly need fabric, thread, and some marking supplies, not extra hardware.
This idea feels unique because it blends organization with doodle art. It’s also trending as “functional journaling” on clothing, where creative people want tools that reflect their mindset.
When you wash it, use gentle detergent and turn it inside out if the design uses heat-set markers.
10. Embroidered Branch Apron With Pocket Leaves

An embroidered branch motif can hold your paintbrush pockets like leaves on a tree. The pockets look organic, and the apron becomes a charming part of your studio personality.
Place pockets along the “branch” line, then stitch leaf-shaped appliqués around the openings. Use thicker thread and clean satin stitches so the embroidery stands up to repeated wear. For personalization, choose thread colors based on the seasons you paint most, like autumn browns or spring greens.
Practical tips include reinforcing pocket edges with bias tape so the fabric doesn’t stretch out over time. Cost considerations are usually friendly if you use embroidery floss and scrap fabric for appliqués. This style matches a current trend toward nature-inspired crafting and cozy handmade aesthetics.
11. Tapestry-Style Panel Apron With Brush Pocket “Mosaics”

Picture an apron that looks like a small wall tapestry, with brush pockets arranged in a mosaic pattern. Each pocket block can be a different fabric texture, giving you an artsy, layered look.
Create pocket “tiles” by sewing short fabric rectangles onto a base panel, then stitch the dividers between them. Add a decorative border around the mosaic to make it feel finished. For practical tips, keep each tile pocket depth consistent so brushes fit comfortably.
To personalize, add tiny motifs like moons, stars, or paint droplets within the mosaic spaces. Cost can vary, but using fabric scraps from past projects can keep it low while still producing a high-impact result.
This idea feels unique because it turns organization into a design feature. It also fits trends where makers use bold quilting-style layouts and mix textures on purpose.
12. Canvas Apron With Inside Brush Tube Sleeves

If you like a cleaner outside look, put brush pockets on the inside. A canvas apron with internal tube sleeves keeps the front smooth while still storing tools securely.
Use a sturdy lining fabric and sew “tubes” that run vertically inside the apron body. Add an exterior pocket only for small items like a cloth or eraser, while the brushes stay hidden. For practical tips, mark pocket positions with chalk before sewing so they align neatly.
Personalization can happen through lining choice, like using a fun print on the inside that appears when you turn the apron open. Cost is often moderate because you’ll use two layers, but it’s still manageable for most budgets.
13. Vintage Scarf Apron With Repurposed Brush Pockets

Use a vintage scarf or two to create a soft, artsy apron with pockets that look like they were part of the original fabric. Scarf material often has beautiful patterns, which makes even simple pockets look special.
Cut scarf pieces into pocket shapes and sew them onto a neutral base apron to balance busy prints. Add a simple closure like a fabric tie or small button for each pocket section. For practical tips, choose a base fabric with enough structure so the scarf pocket doesn’t flop when loaded.
Personalization is easy because vintage prints are already one-of-a-kind. Cost can be low if you shop thrift stores, but you may splurge if you find a truly perfect scarf pattern.
This trend has a timeless feel, since upcycling and vintage styling stay popular with art hobbyists. It’s also a great conversation starter in class because it looks like a found-object sculpture you wear.
14. Scrap-Felt Apron With Tool Belt Brush Pockets
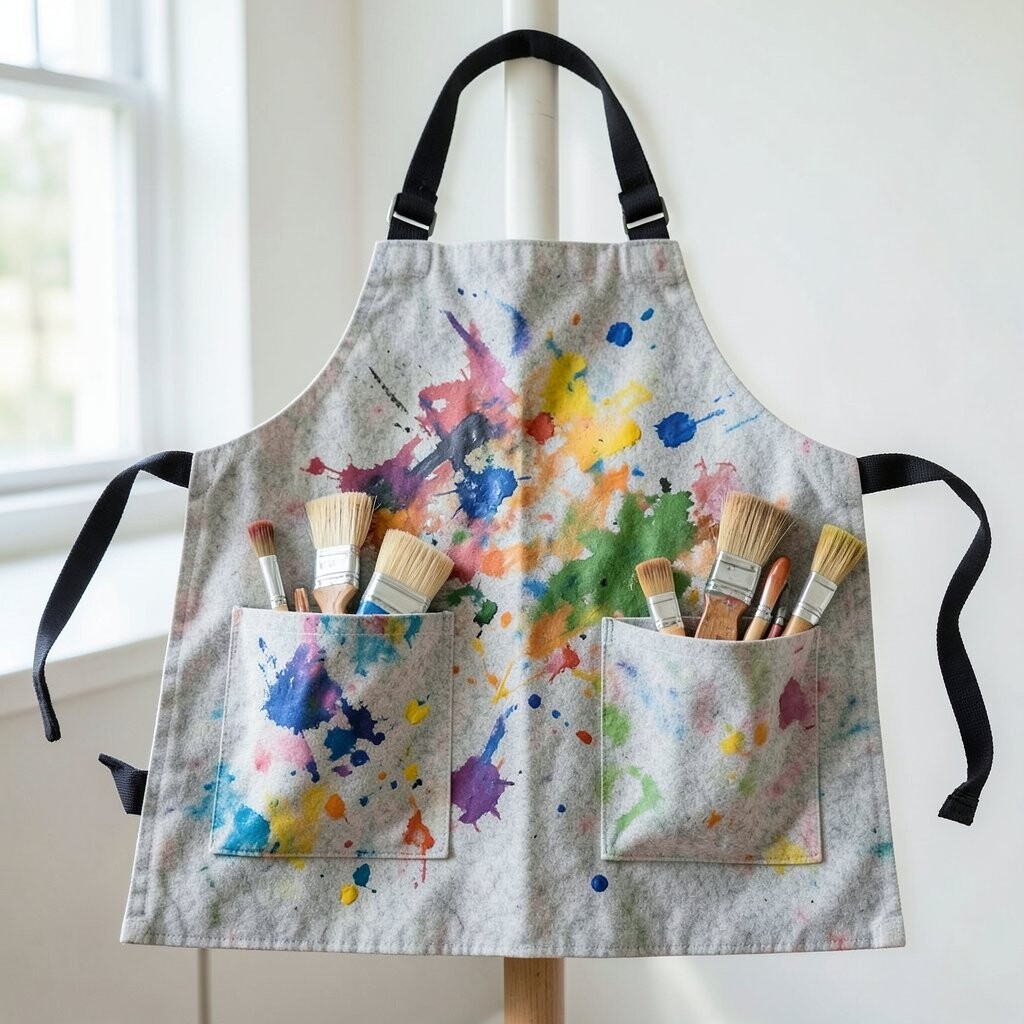
Felt is cozy and easy to shape, so an apron with tool-belt style brush pockets can feel both playful and practical. Build pockets that sit like a belt along the waist, then connect them to apron straps.
Cut felt into pocket panels, then layer a second felt piece for a thicker rim that helps brushes slide in smoothly. Add a tiny loop at the top of each pocket to hold a brush handle more securely. For practical tips, use felt in sections so you can replace one pocket panel if it gets stained.
Personalization can be as simple as choosing felt colors that match your studio lighting or your favorite paintings. Cost considerations are usually friendly since felt sheets are affordable, and you can use small scraps to make the pockets.
15. Monogrammed Apron With Paintbrush Pockets and Measuring Ruler Edge

This apron idea blends craft and practicality by adding paintbrush pockets alongside a ruler-style edge. A subtle measuring strip helps with layout tasks, so you’re not switching tools as often.
Sew a brush pocket row into the front near the ruler strip, keeping the openings wide for quick access. Use a heat-resistant thread or durable topstitching so the ruler edge stays flat. For practical tips, add a small pocket inside the front panel for measuring clips or tape ends.
Personalization is a major highlight here because you can monogram the apron in block letters or stitch a tiny paint palette next to the name. Cost can be moderate if you use pre-made ruler trim, but you can also stencil a ruler design directly onto fabric.
This concept feels current because artists love “two-in-one” tools that reduce clutter. It also works well for teaching settings where measurement matters for repeated projects.
16. Flowing Sash Apron With Diagonal Brush Pockets
A sash-style apron with diagonal pockets can look elegant and feel surprisingly ergonomic. When pockets run diagonally, your hand naturally follows that angle while painting, which can make grabbing brushes smoother.
Cut the pocket openings into a diagonal line from one side panel to the other, then secure them with flaps or elastic trim. Choose fabric with a bit of stretch for comfort at the waist, especially if you paint for long sessions. For personalization, tie the sash in your favorite knot style and add a small fabric tag where the knot lands.
Cost considerations are usually budget-friendly because you mainly need simple panels and basic closures. This style fits a trend toward “soft tailoring” in craft clothing, where aprons look like handmade fashion instead of plain shop gear.
17. Gallery-Wall Apron With Brush Pockets as “Frames”

Create a gallery-wall look by building brush pockets inside frame shapes. Each pocket becomes a little “artwork” display, which makes your tools feel curated instead of stored away.
Use contrasting fabric strips to form rectangular frames around the pockets, then add a lining that matches the frame color. Stitch small fabric hooks or flaps that close like a picture opening, helping keep bristles tidy. For practical tips, make one frame slightly taller to fit your biggest brush or stencil brush.
Personalization is fun here because you can add faux labels under each frame, like “Sky,” “Leaves,” or “Highlights.” Cost can be moderate depending on fabric choices, but it’s easy to keep within budget using scrap prints and simple frame trims.
This idea stands out because it turns function into decoration with a museum vibe. It also aligns with current trends in home studios where people want their supplies to look as good as their finished art.