
A deck can look tired in one season, even if the boards still feel solid. A few smart DIY upgrades can make it look brand new fast.
1. Pressure-Wash + Brighten-Then-Seal Refresh

After pressure washing, the deck boards look lighter and more even, with grain that finally shows again. Sealing right after helps lock in that “before-and-after” glow.
Start by moving all furniture, then rinse thoroughly so no cleaner residue stays in the wood. Use a deck brightener if the surface looks grayish instead of warm and natural. After it dries completely, apply a clear water-repellent sealant in thin, even coats for a smooth finish.
2. Stain Over Old Color Without Stripping the World

Many decks don’t need full sanding to get a fresh look. A good test spot can show whether your old stain is still gripping.
Choose a semi-transparent stain that matches your desired mood—honey, cedar, or walnut tones all change the vibe. Lightly scuff glossy areas and clean off dust so the new stain can bond well. If the wood still flakes or feels powdery, you’ll likely need a more serious prep before staining.
For cost control, buy sample sizes first, then scale up to your square footage only after you like the color in daylight.
3. Replace a Few Boards for a “New Deck” Look
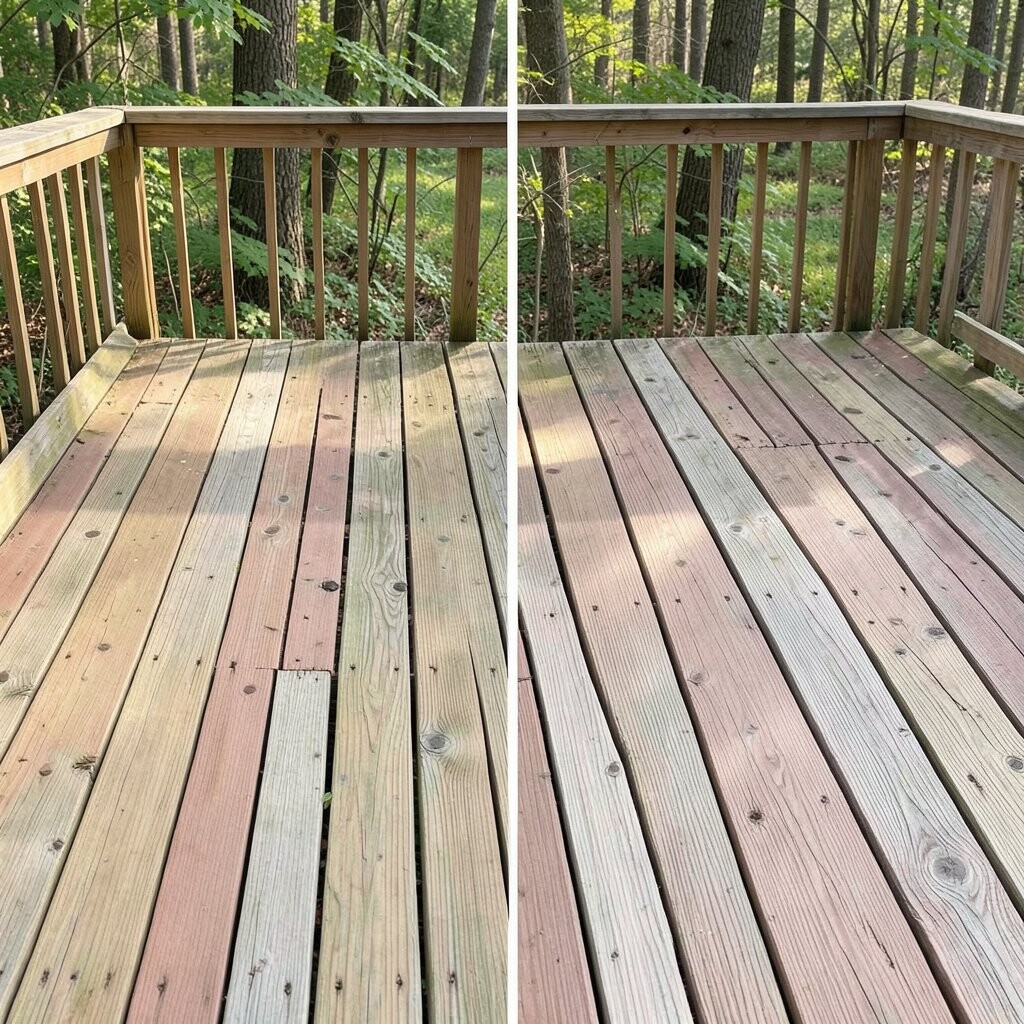
Sometimes the fastest makeover is repairing what’s truly broken. Swapping out a handful of warped boards can make the whole surface look straighter.
Before you cut, check for rot at the screw lines and along joist edges, because that’s where damage often spreads. Match the board thickness and wood type as closely as possible to avoid uneven gaps and different color after finishing. After installation, sand the repaired area so the texture blends with the surrounding planks.
Finish with the same stain or sealant you’ll use for the rest of the deck to keep everything visually tied together. This approach is unique because you keep most of the original deck while still removing the “problem spots” people notice first.
Budget tip: prioritize boards near the edges where feet land most and where water collects during rain.
4. Built-In Planter Boxes Along the Railing

Before this makeover, the railing looked empty and plain, like it was missing personality. After adding planter boxes, the deck feels inviting and lively every time you step out.
Use rot-resistant lumber or pressure-treated boards, then seal the inside with a liner or waterproof coating. Keep the soil contained so water doesn’t drip onto the deck boards and cause dark streaks. For personalization, paint the planters to match your house trim or use a stain that matches your deck color.
5. Outdoor Shiplap Panels Under the Deck Edge

Under-deck areas can look unfinished, with storage clutter and shadowy gaps. A DIY shiplap-style paneling upgrade makes the underside look cleaner and more intentional.
Attach furring strips first so boards sit evenly and you can improve airflow. Choose exterior-rated boards, then prime and paint or seal based on your climate. Add a trim board along the edges for a neat line that looks custom.
This makeover stands out because it changes what people see when they’re seated, not just when they’re standing. It’s also a great place to add subtle lighting later without reworking the whole deck.
6. Replace the Guardrail Posts for Instant Upgrades

Older rail posts can wobble, leaving the deck feeling less secure. New posts make the entire structure look sturdier and more polished.
Measure carefully, square the framing, and use exterior-grade fasteners for a strong hold. After installation, sand rough edges and apply the same protective finish used on the deck boards. If you want extra flair, swap basic caps for decorative ones that suit your home style.
Cost consideration: post replacement costs less than a full rebuild, but it’s worth doing only where needed so your budget stays focused.
After your new hardware is set, you’ll notice how “finished” the deck feels from the street.
7. Add DIY Deck Steps With Matching Stain

Before, the deck might have had awkward access or narrow steps that felt unsafe. After adding wider, solid steps, the whole layout becomes easier to enjoy.
Use sturdy framing, plan for consistent riser heights, and confirm the landing level before you commit to boards. Build the treads from deck boards that can handle foot traffic and moisture. Once assembled, stain the steps the same day or within the same weather window to avoid color mismatches.
To personalize the look, add a simple handrail on one side, or round the edge of the top landing board for comfort. This upgrade is practical because it improves everyday movement, not just appearances.
8. Corner Pergola With Reclaimed-Wood Beams

Before, the corner of the deck may have been sunny and plain. After adding a small pergola with reclaimed-looking beams, that corner becomes a shaded “hangout” zone.
Choose materials rated for outdoor use, then seal reclaimed-style boards so they resist moisture and splitting. Build a small footprint structure so it’s easier to DIY, and anchor it securely to avoid wobbling. Paint or stain the beams so they harmonize with your deck color and siding.
For unique character, keep a few beams slightly varied in tone to mimic natural age. This trend keeps growing because it blends warmth with function, giving you a focal point that also helps with light control.
Budget note: smaller pergolas cost less than full-cover designs, and you can add shade fabric later if you want more coverage.
9. Outdoor Rug + Non-Slip Underlayer Makeover

Some decks look “flat” because there’s no visual zoning for dining or lounging. After adding an outdoor rug plus a non-slip underlayer, the deck instantly feels more styled.
This makeover is unique because it’s low-lift and reversible, so you can switch styles with seasons. Pick a rug sized to anchor furniture legs while leaving enough space to clean around edges. Use a breathable underlayer so air can pass and water won’t trap underneath.
To keep the look crisp, rinse the rug regularly and let it dry fully before storing it for heavy rain months. Cost-friendly tip: start with a smaller rug for your main seating area, then expand later.
Current trend: bold geometric patterns are popular because they contrast nicely with natural wood tones.
10. Wrap the Posts With Decorative Lattice Panels

Before, the posts and vertical spaces were visually busy but not attractive. After wrapping them with lattice panels, the deck gains texture and a softer look.
Use exterior lattice cut to size, then secure it with metal brackets or hidden fasteners. Paint the lattice or stain it so it ties into your deck finish. If privacy matters, install the panels only where neighbors can see most, saving materials and effort.
Personalization idea: use a repeating pattern that matches your home’s exterior siding accents, so the deck looks like part of a bigger design plan.
11. Replace Railings With Slim Balusters for a Modern Look

Before, chunky rail sections may have made your deck feel heavy. After switching to slim balusters, the deck looks brighter and more open.
This makeover stands out because it changes sightlines, so the yard beyond feels more connected. Measure spacing carefully, then install evenly so the lines look straight from every angle. Pair the balusters with a clean handrail finish to keep the design cohesive.
Cost consideration: this is more work than staining, but it can still be cheaper than a full deck replacement. If you can’t DIY the framing portion, hire help for the first section and finish the rest yourself.
Finish tips: prime metal parts to prevent rust, then apply a durable outdoor-rated topcoat.
12. DIY Outdoor Lighting in Rail or Step Channels

Before, the deck might have looked great in daylight but felt dark at night. After installing simple lighting, it becomes usable for evenings and gatherings.
You can add solar path lights, low-voltage step lights, or LEDs tucked into rail channels. Plan wiring or placement so lights don’t shine directly into windows, which keeps the experience comfortable. For personalization, choose warm white bulbs for a cozy glow.
13. Add a Privacy Screen With Matching Deck Finish

Before, you may have wanted more privacy while relaxing but didn’t want tall fencing. After building a deck-height privacy screen, the space feels calm and more “yours.”
Use pressure-treated boards or outdoor-rated composite, then finish them with the same stain system as your deck for a cohesive look. Install the screen on sturdy posts or brackets so it doesn’t sway in wind. For practical benefit, leave small gaps at the bottom for airflow and easier cleaning.
Personalization idea: weave in outdoor fabric panels or attach planters near the screen to soften the edges.
Trend angle: modern privacy screens often mix wood slats with metal brackets for a clean, contemporary feel.
14. Fresh Paint on the Deck Frame and Trim
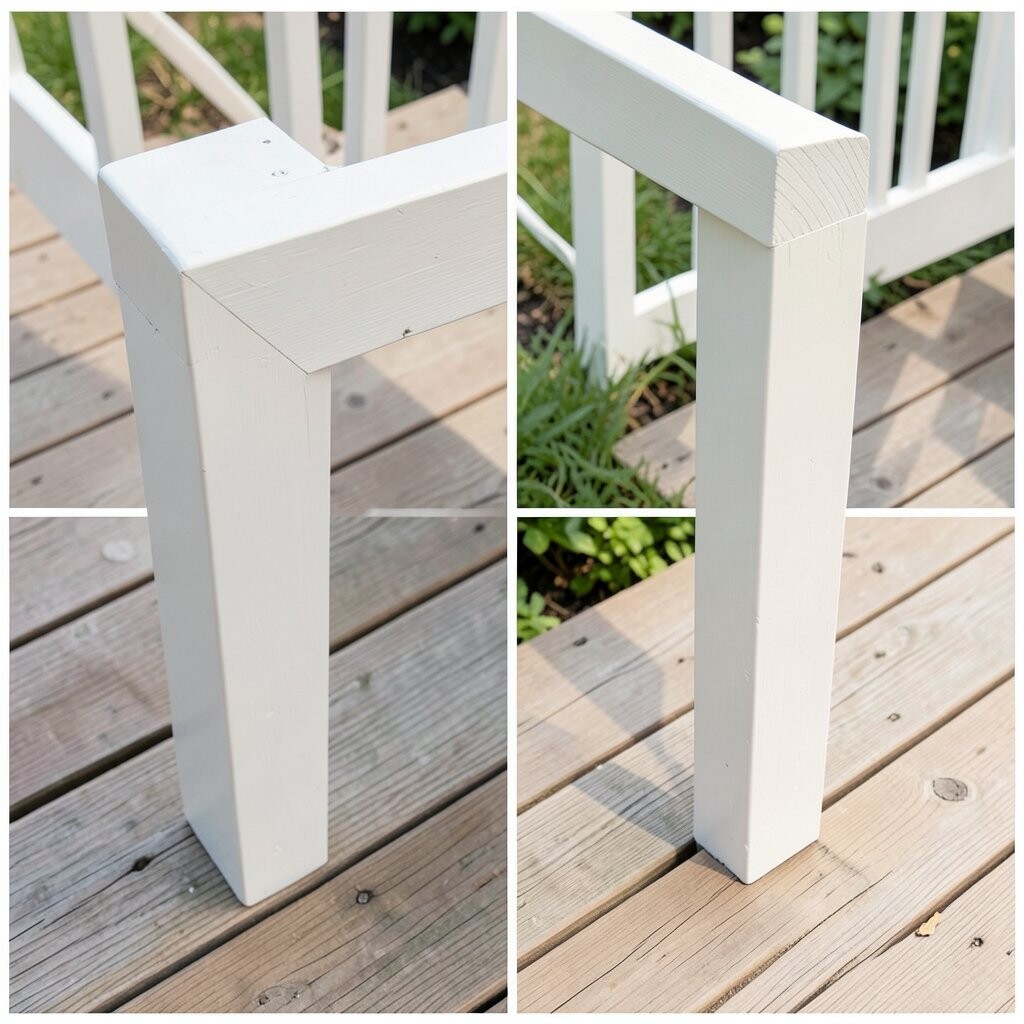
Before, the deck frame might have looked mismatched with the house trim, like a separate accessory. After painting trim in a coordinating shade, everything blends and looks intentional.
Strip loose paint, sand rough spots, and prime bare areas so the new coat sticks. Use exterior paint rated for wood and outdoor conditions, and apply thin coats to avoid drips. If your deck boards are stained, keep paint limited to railings, framing, and trim so you don’t fight with deck foot traffic on top surfaces.
15. Build a Simple Outdoor Kitchen Counter From Deck Offcuts

Before, the deck may have lacked a dedicated prep spot, so everything had to be carried back and forth. After adding a small counter, cooking and serving feels easier and more organized.
Use treated wood and seal it well, then build a compact surface that fits next to your grill or seating. Add a shelf underneath for storage, and consider a removable cutting board top for sanitation. Finish the counter with a weatherproof seal so spills won’t ruin the wood.
This makeover is unique because it reuses wood offcuts and saves money while making the deck more functional. Cost consideration: the counter cost is usually mostly fasteners, sealant, and a solid tabletop material if you choose stone or composite.
16. Screened Storage Bench With Weatherproof Lid
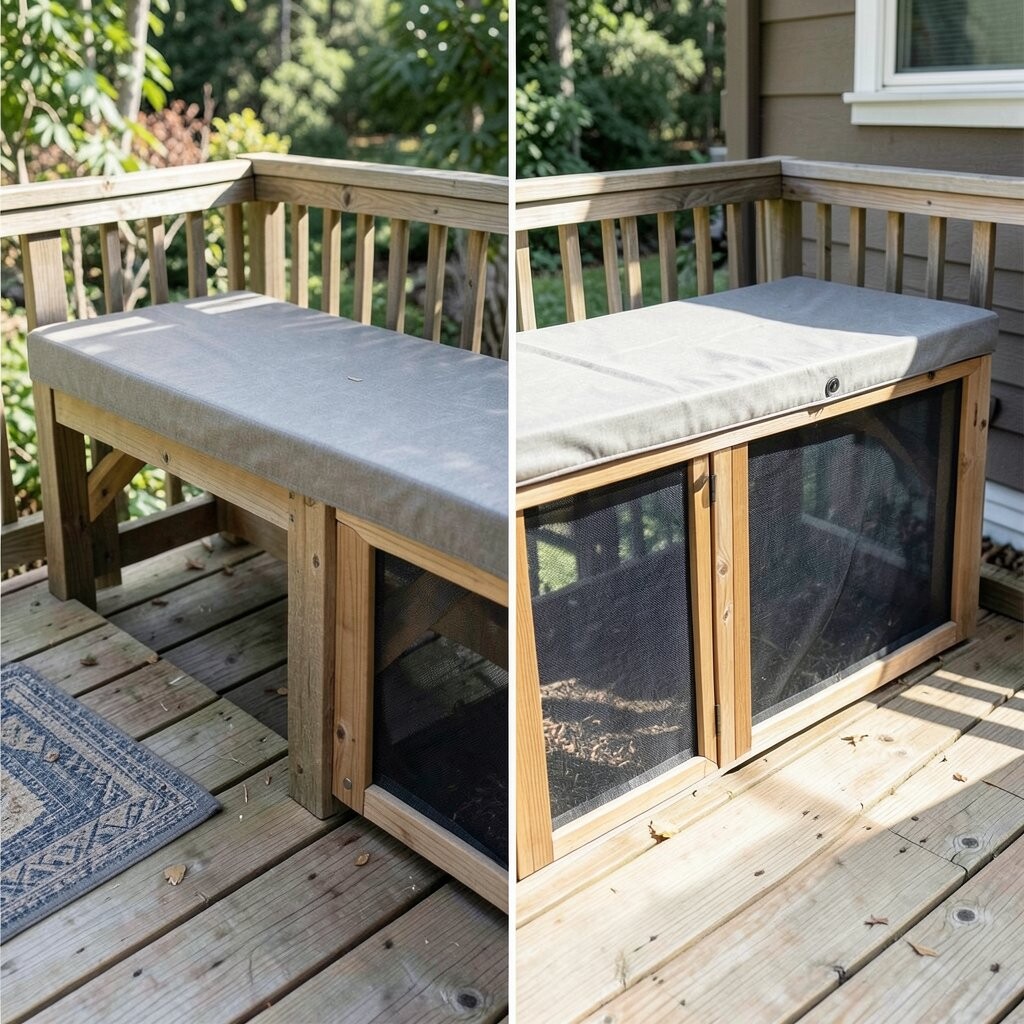
Before, patio items might have sat in cluttered piles or got soaked in rain. After building a storage bench with a weatherproof lid, the deck looks tidy and stays protected.
Plan the bench around your storage needs, add ventilation gaps if needed, and seal all cut edges thoroughly. Use hinges and latches designed for outdoor use so the lid opens smoothly and closes tight. Personalization idea: stain the bench to match the deck, then add a cushion on top for a comfortable seat.
For trend alignment, many DIY decks now include hidden storage, because it keeps outdoor spaces looking clean without extra furniture clutter.