
A hallway can feel like a plain in-between space. With mixed media art, it can start telling a story the moment you walk in.
1. Layered Texture Collage With Fabric + Paper

Start with a base made from paper scraps, printed ephemera, or even old book pages. Add fabric pieces like stitched squares, lace trim, or a soft ribbon strip to create depth that looks good from any angle.
This design works especially well in hallways because it hides small wall flaws and adds warmth without needing large frames. Use lightweight materials and anchor them with museum wax, picture-safe mounting putty, or thin picture hooks so everything stays secure. Choose a tight color palette—cream, warm gray, and muted terracotta—so the mix still feels calm.
2. Framed Shadowbox Medley With Mini Objects
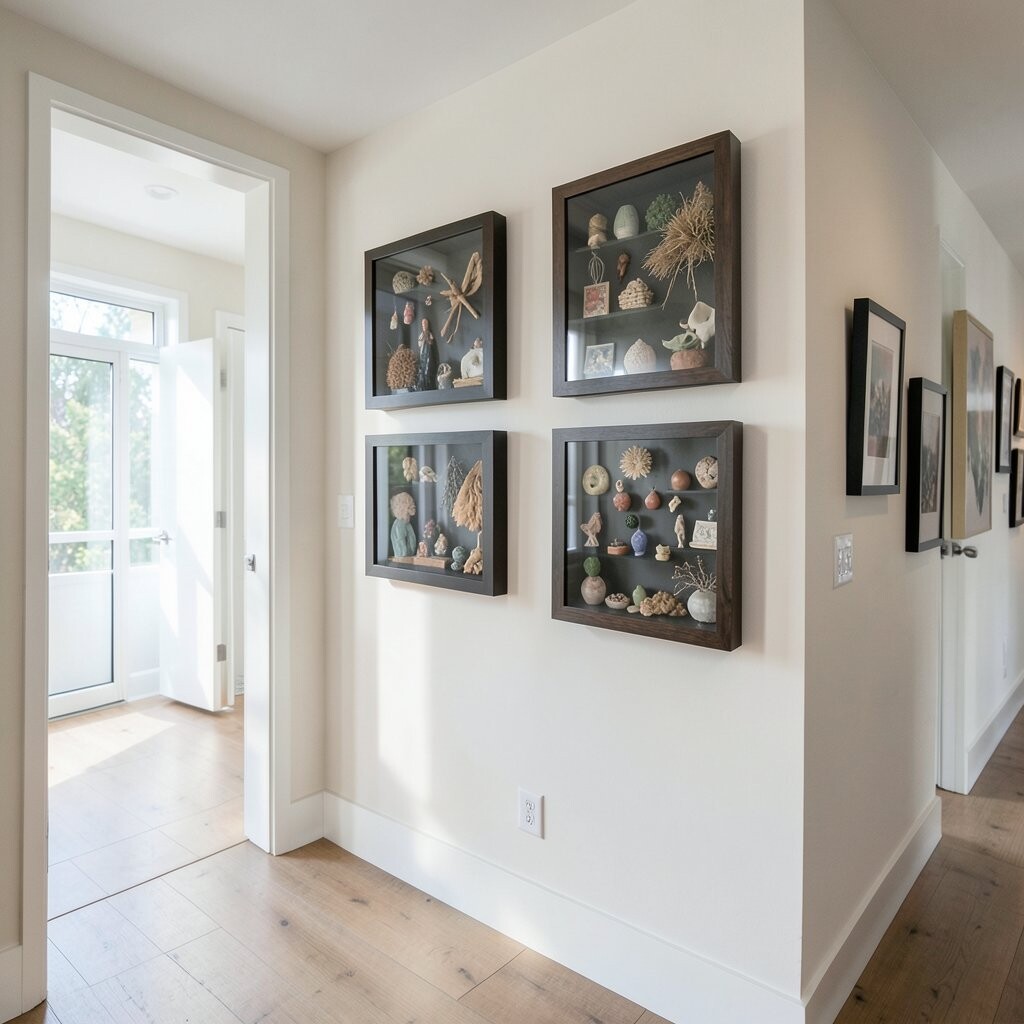
Choose several small shadowboxes and fill each one with a different “tiny scene” made from buttons, pressed leaves, or tiny paper cutouts. The glass front protects the pieces, and it makes the hallway feel curated instead of cluttered.
Shadowbox galleries are unique because they mix art with real-life textures, and you can update them seasonally by swapping a single box. Keep measurements consistent by using the same frame width and spacing rules for every piece. Add one neutral background inside each shadowbox so shiny objects don’t overpower the whole look.
For cost considerations, shop for simple frames at a discount store and build the inserts yourself. If you want a more polished look, stain or paint the backing paper and use a fine-gauge mesh or foam board for layering. This style also fits current trends like “micro-display” decor that feels personal and collectible.
3. Nautical Map + Lettering Mix For A Coastal Mood
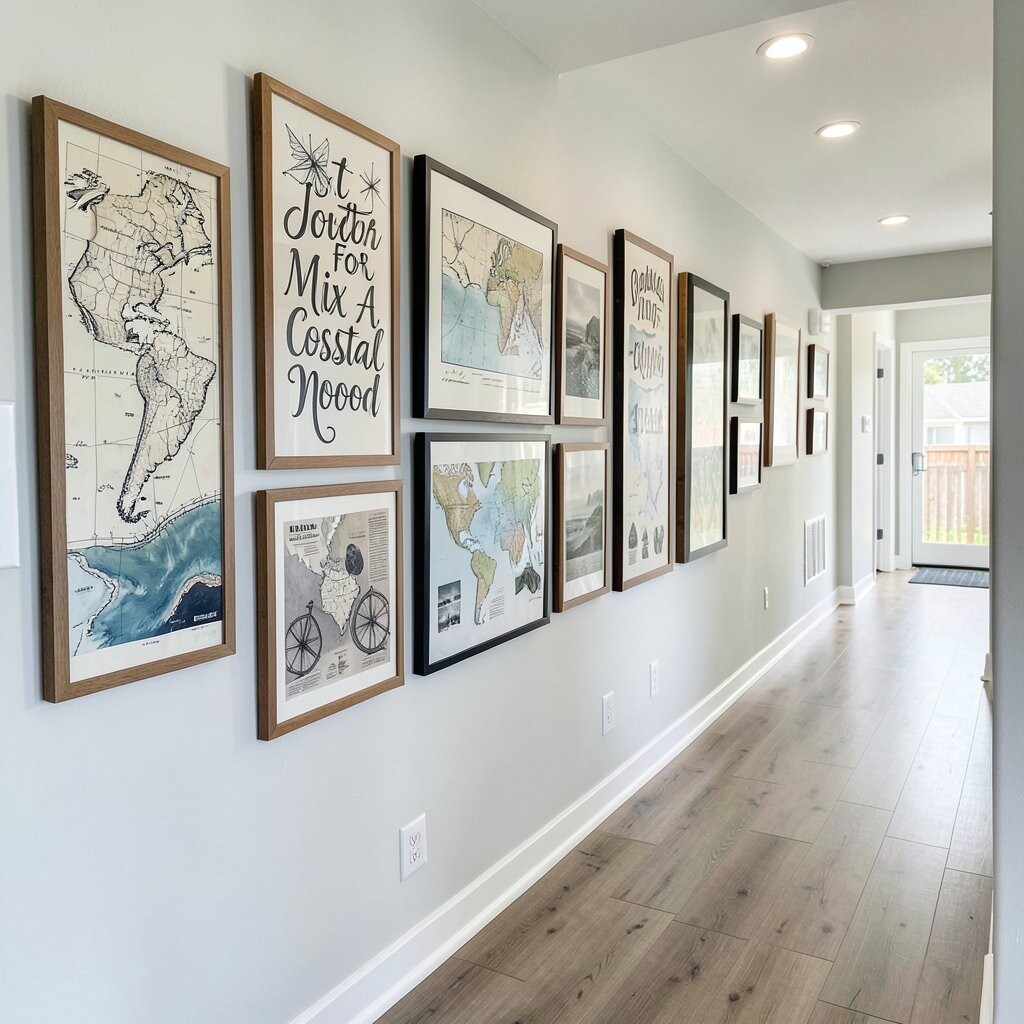
Print or copy old-style maps and cut them into shapes that fit different frames. Then add mixed media lettering using stencils, hand-written quotes, or typed words on aged paper.
To keep the hallway looking balanced, pair one larger map piece with several smaller letter prints and label cards. Use ocean-adjacent colors—navy, seafoam, and sun-faded sand—to make the mix feel intentional. Add a small touch of texture with torn masking tape, fabric twine, or a thin strip of burlap under the paper layers.
This idea feels unique because maps carry history and motion, while lettering turns the gallery into a message. Practical tip: align the main compass-like element of each map so your eye moves smoothly down the hall. Personalize it by adding your family’s favorite location, the year you moved in, or a short phrase that matches your home’s personality.
If you’re working with a tight budget, use thrifted frames and replace the art mats with your own cut paper. Consider using archival spray for paper to help prevent fading, especially near windows or strong light. This look is also popular right now because it blends vintage design with modern layout discipline.
4. Monochrome Print + Pen Drawing Pairings

Pick a monochrome theme using black, white, and gray prints, then mix in pen-and-ink sketches. The high contrast looks crisp in narrow hallways and gives your wall a gallery feel without needing bright colors.
It’s practical because monochrome keeps the visual noise low while still letting each piece show its texture. Choose frames with the same finish—matte black or simple wood—to unify the mix. Personalize by drawing your own icons, like tiny stars, your initials, or small “daydream” doodles in the margins.
5. Color-Blocked Prints With Collage Edges

Use color-block art like bold rectangles, then break each block with collage edges. You can do this with ripped paper strips, painted tissue, or thin cardstock cutouts that peek out from behind the main print.
This style is unique because it turns “messy borders” into a deliberate design element. Keep it practical by planning your spacing first and using a consistent gap between frames. For cost, you can print digital designs at home and add collage details using inexpensive paper, gel pens, and glue.
Personalize the palette to match your hallway paint or runner rug, and consider adding one metallic accent piece for a modern touch. Current trends often lean toward graphic simplicity, so this idea gives you bold energy while staying clean. If the hallway is dim, choose lighter colors and avoid too many dark-only pieces.
6. Gallery Rail With Rotating Mixed Media Cards
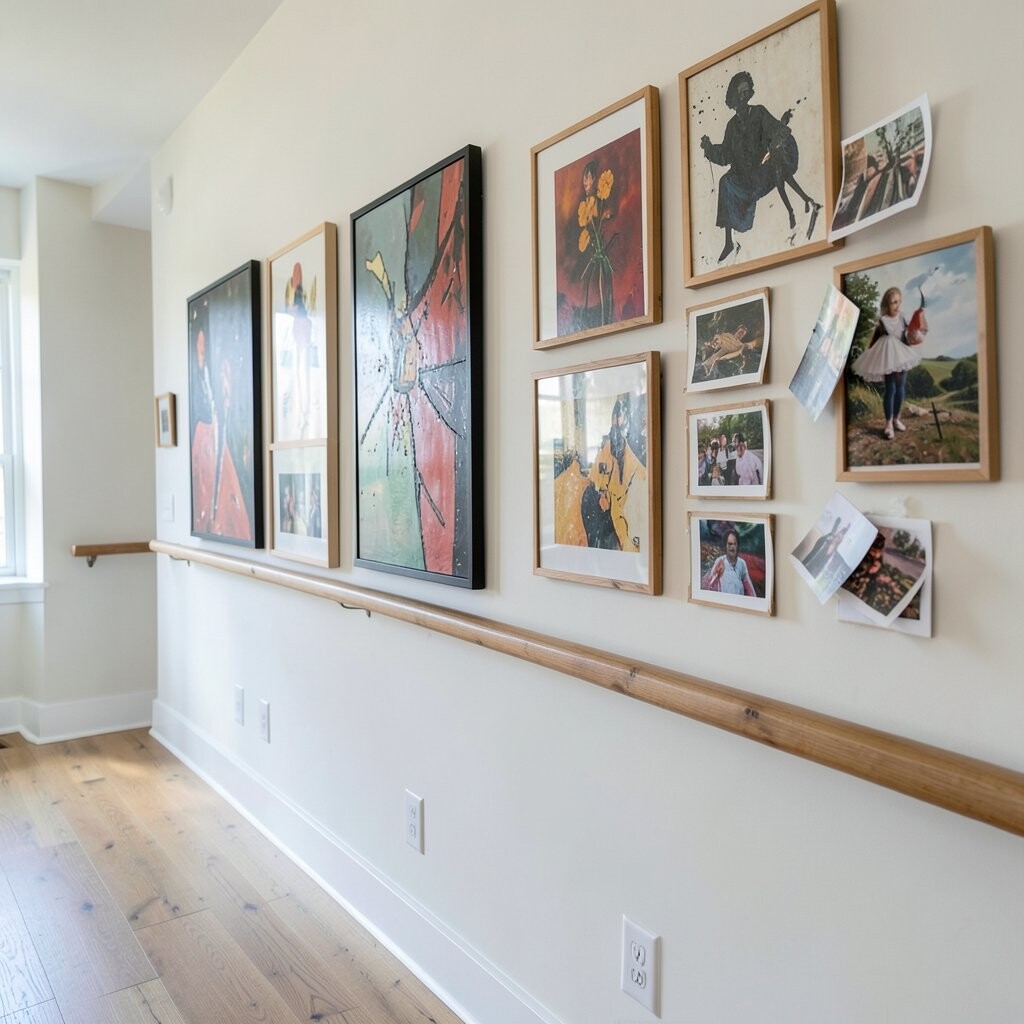
A hanging rail system lets you display small mixed media cards like mini collage canvases, postcards, or layered paper squares. This makes your hallway feel alive because you can rotate pieces without re-hanging everything.
It’s beneficial if you love changing decor, since you can swap in seasonal designs, new sketches, or event mementos. For practical setup, install the rail level, then use uniform card sleeves or acrylic display clips for a tidy look. Personalize it by dedicating a section to a rotating “month of memories” display.
Cost-wise, rails can be affordable, especially if you buy a standard size and cut small mounts to fit. This approach also matches current trends toward flexibility and “curated freshness.” You’ll get a gallery wall that doesn’t feel stuck in time.
7. Fabric Banner Frames For Soft, Dim-Friendly Style
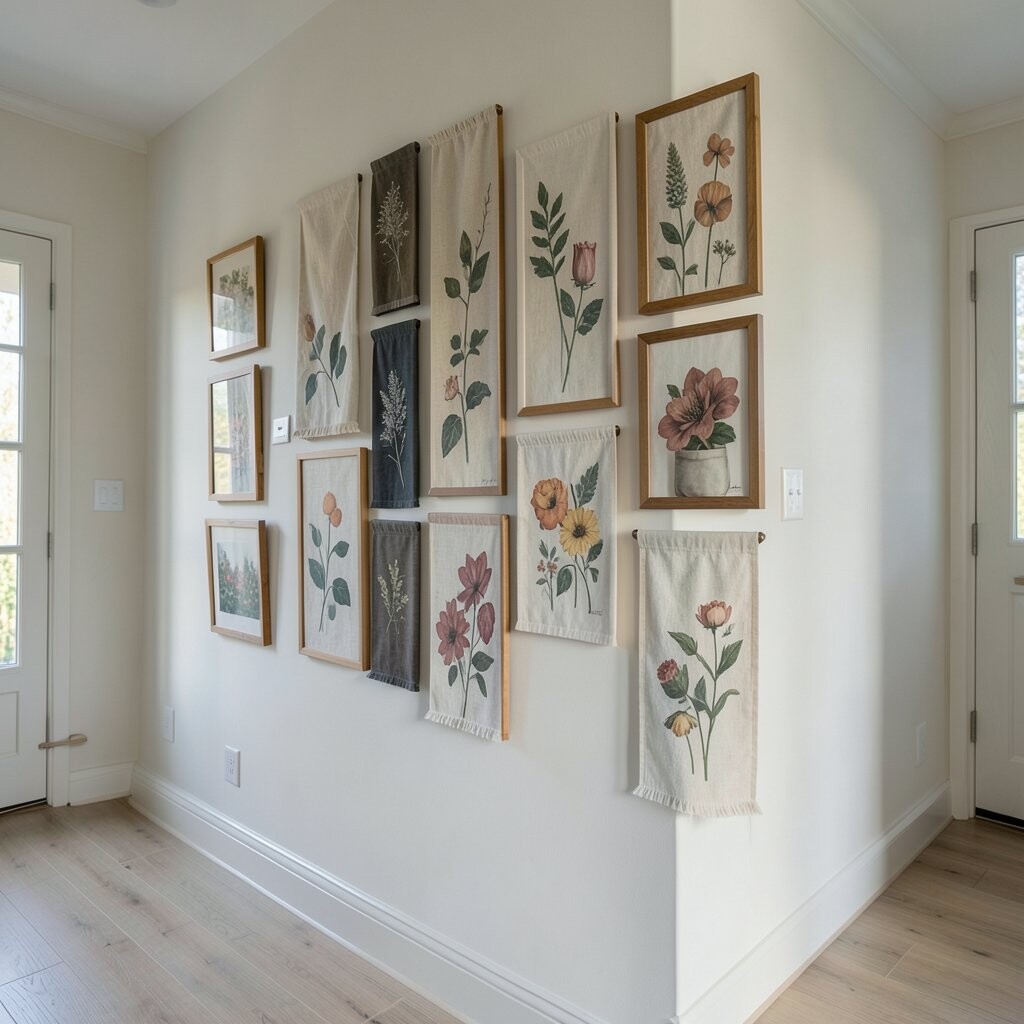
Instead of only using framed art, stretch fabric like linen, patterned cotton, or stitched panels and place them in frames with backing. Hallways often have softer lighting, and fabric catches it beautifully while adding cozy texture.
This is unique because the wall reads like art textiles rather than flat posters, and it’s gentler on the senses than overly glossy prints. Use lightweight fabric and keep edges neatly finished with simple hemming or glue along the backing. Practical tip: keep the fabric tension even by pressing and smoothing before mounting.
Personalize with patches that mean something to you—travel fabric, a special gift scarf, or fabric from clothing you love. If you want it budget-friendly, look for remnant fabric or thrifted scarves. For durability, choose fabrics you can lightly spot-clean and avoid placing them where they’ll collect dust easily without a wipeable surface behind.
8. Vintage Book Page + Botanical Specimen Layout

Layer vintage book pages with botanical prints, then add “specimen” details using small tags or tea-stained paper labels. Arrange them like a gentle museum display, but keep the tone personal and warm.
This design is great for a hallway because it feels thoughtful and organized, even when the materials vary. Use small botanical drawings, pressed-leaf art, or faux specimen cards cut from cardstock. Keep the spacing consistent so the collage edges look intentional rather than random.
To make it unique, vary the texture by mixing matte book paper with slightly glossy botanical prints and a few textured label pieces. Practical suggestion: seal pressed items under glass when possible, and avoid placing them where humidity is high. Personalize by adding plant names tied to your garden or the story of your home.
If you’re watching costs, print botanical pages for free using online archives, then use discount frames. A trend right now is “quiet collectors” aesthetics, which often includes botanical and specimen-inspired art. This fits that vibe while still feeling handcrafted.
9. Colorful Tape + Abstract Paint Scraps In Frames

Make abstract pieces by layering painted paper scraps inside frames, then outline some edges with colorful painter’s tape. It’s a fun way to use small leftover art materials instead of buying new ones.
This is unique because the tape creates graphic lines that look both modern and handmade. Keep a consistent tape thickness and choose a few repeating colors so the hallway gallery stays cohesive. Practical tip: use acid-free tape or tape that won’t yellow, and keep everything flat before sealing under glass.
Personalization is easy—use your favorite colors, add a tiny signature mark, or include a date on one piece like a mini art journal page. For cost considerations, use inexpensive cardstock, water-based paint, and leftover scrap paper. Current trends often favor “process art,” and this style shows the creative journey right on your wall.
If the hallway is narrow, consider horizontal frame arrangements to reduce visual clutter and guide the eye forward. To prevent glare, pick frames with matte finish and place stronger light away from the glass. This setup can look airy while still being full of texture.
10. Oversized Statement Piece With Surrounding Small Finds

Choose one oversized mixed media artwork as the anchor, then surround it with smaller frames that each add a different texture. Think one bold collage canvas, paired with miniature prints, fabric squares, and a small shadowbox.
This layout is beneficial because one main piece prevents the hallway wall from feeling too busy. It’s unique because the wall becomes a focal point, not just a collection of pictures. Practical tip: hang the center of the oversized piece slightly above typical eye level to keep the hallway feeling taller.
Personalize by making the anchor a theme—family timeline, travel collage, or your favorite artwork style. Cost-wise, you can buy one splurge piece and build the rest with inexpensive prints and secondhand frames. This is also popular right now because it matches the trend of “one hero, many supporting pieces.”
11. Woven Rattan + Paper Cut-Out Display

Mix textured woven elements like rattan-style panels or basket fragments with paper cut-outs that create shapes. The combination adds a natural look that feels grounded and calming in a hallway.
This design is unique because the woven texture brings dimension without needing heavy 3D sculptures. Practical suggestion: use lightweight weaving accents attached to foam board so they don’t sag over time. Choose cut-out shapes like circles, leaves, or simple geometric forms to keep the wall visually neat.
Personalize by cutting shapes that relate to your home, like a house icon, a letter, or a favorite animal. For cost considerations, you can reuse old woven pieces, thrift decorative items, or purchase small natural accents in bulk. This approach aligns with current trend themes like natural texture and organic materials that pair well with modern decor.
12. Gallery Wall With Layered Matting (No-Mess Overlaps)

Build your mixed media look using consistent frames, but vary the mats so artwork overlaps in a layered way. Even if the content is different, the mat layers unify everything and make the wall feel designed.
This layout is practical because it hides small misalignments and gives your hallway a polished finish. Use thick mats for depth, and consider one or two pieces with extra-wide mat borders to create visual breathing room. Personalize by choosing mat colors that match hallway tones, like warm white, oat, or soft gray.
This idea is unique because it focuses on “presentation,” letting texture and paper quality show without chaos. For cost considerations, buy pre-cut mats or use simple mat boards from craft stores if you’re handy. The current trend of clean framing plus mixed-media content makes this feel fresh and modern.
13. Kids’ Art Meets Adult Style With One Shared Theme
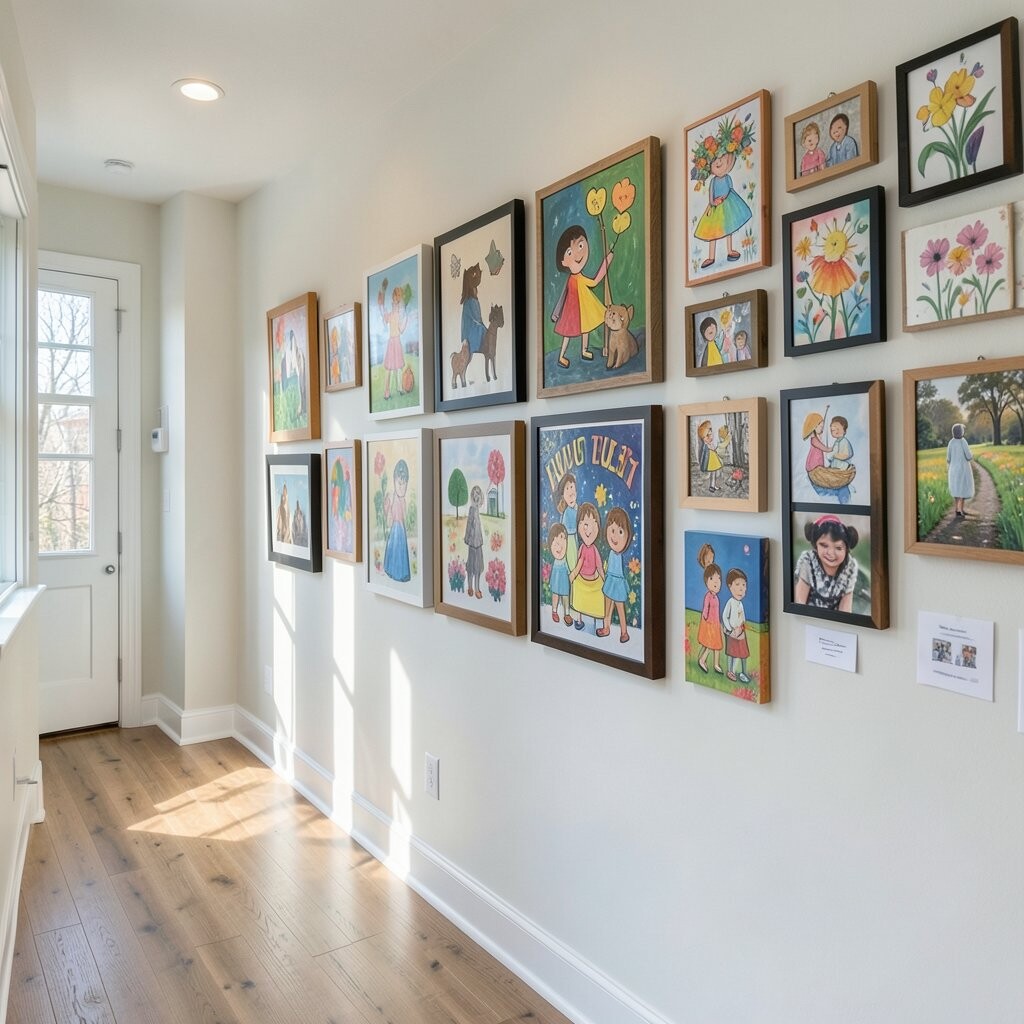
Create a cohesive gallery by selecting several drawings or crafts, then placing them alongside adult-designed prints under a shared theme like “garden,” “space,” or “music.” This makes the hallway feel joyful while still looking intentional.
This is beneficial because you can preserve memories in a stylish way without turning the wall into a random pinboard. Practical tip: laminate or glass-protect the pieces if they’re fragile, and keep frame styles consistent for a smoother look. Personalize by adding short captions on small tags, like “first try” or “favorite song,” to keep the meaning clear.
For cost considerations, use a mix of thrifted frames and inexpensive prints you can replace later. This also fits current trends in family-centered decor, where homes look lived-in and meaningful. Keep the color scheme controlled so the gallery doesn’t overwhelm a narrow hallway.
14. Metallic Accent Collage With DIY Surface Texture

Use a base of neutral paper or fabric, then add metallic accents like foil leaves, brushed gold tape, or silver ink splatters. To create surface texture, use gel medium, paste, or fabric scraps so it’s not just shiny and flat.
This is unique because the metallic touch catches light and turns the hallway into a subtle glow zone. Practical suggestion: limit metallic pieces to a few elements per artwork so the look stays elegant. Personalize by matching the metal tone to your hallway lighting fixtures, like warm brass or cool chrome.
Cost-wise, you can buy small foil sheets and use them sparingly to get a high-impact effect. This style is trending because “specular” accents—things that reflect light—are popular in modern interiors. If your hallway is dark, metallic accents can help the gallery feel brighter without adding more lamps.
15. Travel Ticket + Photo Strips With Handmade Index Cards

Turn travel souvenirs into art by combining photo strips, ticket stubs, and postcard corners with handmade index cards. The index cards can hold dates, destinations, or a short note, creating a timeline feel.
This design benefits families because it organizes memories and reduces clutter in drawers. It’s unique because the text pieces act like captions, so the gallery tells a story as you walk by. Practical tip: preserve fragile paper under glass and use acid-free glue or archival tape for safer longevity.
Personalize by choosing index card sizes that match your frame openings, then keep the handwriting style consistent for a cohesive look. For cost considerations, print photos at a budget-friendly size and repurpose ticket scans or receipts you already have. Current trend energy favors “documentary decor,” and this concept fits that perfectly.
16. Colorful Tile-Style Prints With Mixed Media Borders

Create a tile-like gallery using several mid-size frames in a grid pattern, then add mixed media borders inside each one. Use patterned tape, fabric strips, or small paint-wash backgrounds so every “tile” feels slightly different while staying coordinated.
This layout is practical because grids are easy to measure and align, which helps in a hallway where walls can feel narrow and long. It’s unique because each frame becomes a tile, turning the hallway into a gallery walkway rather than a single wall of pictures. Personalize by matching the tile palette to your hallway rug or front door colors so the art feels connected to the rest of your home.