
Old furniture can feel stuck in the past. A few smart changes can make it look brand new.
1. Chalk-Paint Dresser With Modern Hardware

Start with sanding and a good clean so the paint sticks well. Then add chalk paint in a soft matte color for a calm, updated look. Choose brass or black hardware to make the “after” feel sharper and more intentional.
For the before-and-after vibe, picture a worn dresser with dull knobs becoming a smooth, welcoming centerpiece. Use a small foam roller for even coverage and let each coat dry fully before adding another. To keep it durable, finish with a wax or clear topcoat, especially on areas that get touched often. If you want a budget-friendly upgrade, swap only the knobs first and paint later when you’re ready.
2. Removable Slipcover Accent Chair
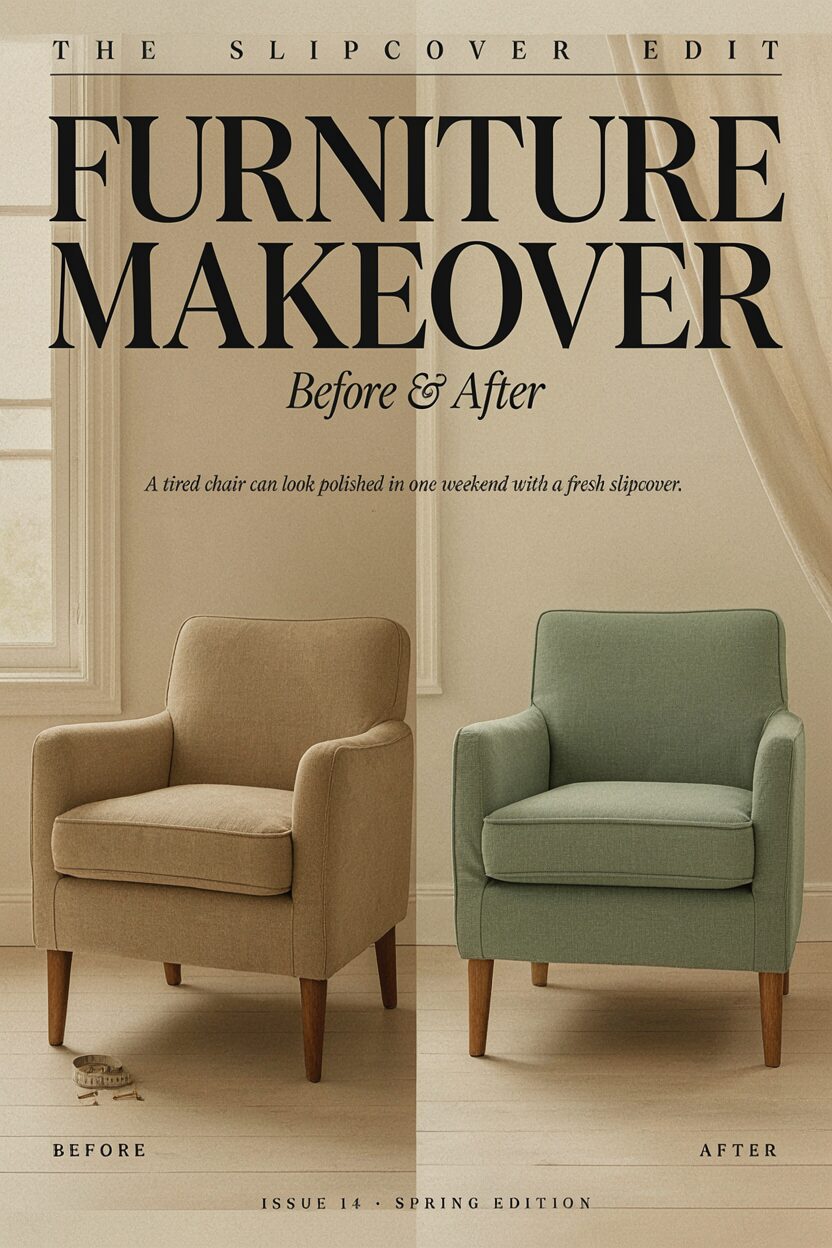
A tired chair can look polished in one weekend with a fresh slipcover. Pick a washable fabric that matches your room’s color story and fits snugly at the seams. A fitted cover hides stains and sagging without replacing the whole piece.
Choose a slipcover style that fits how your chair moves, whether it’s loose for comfort or tailored for a neat look. Use thumbtacks or grippers under the base if the cover tends to shift. This makeover is unique because you can “after” the chair again and again by changing covers as trends shift.
To personalize, consider piping around the edges or a subtle pattern like small checks. Measure carefully before buying so the fit doesn’t bunch at the arms. If cost matters, you can sew a simple cover at home using an old bedsheet pattern as practice.
3. Two-Tone Cabinet Makeover With Color Blocking
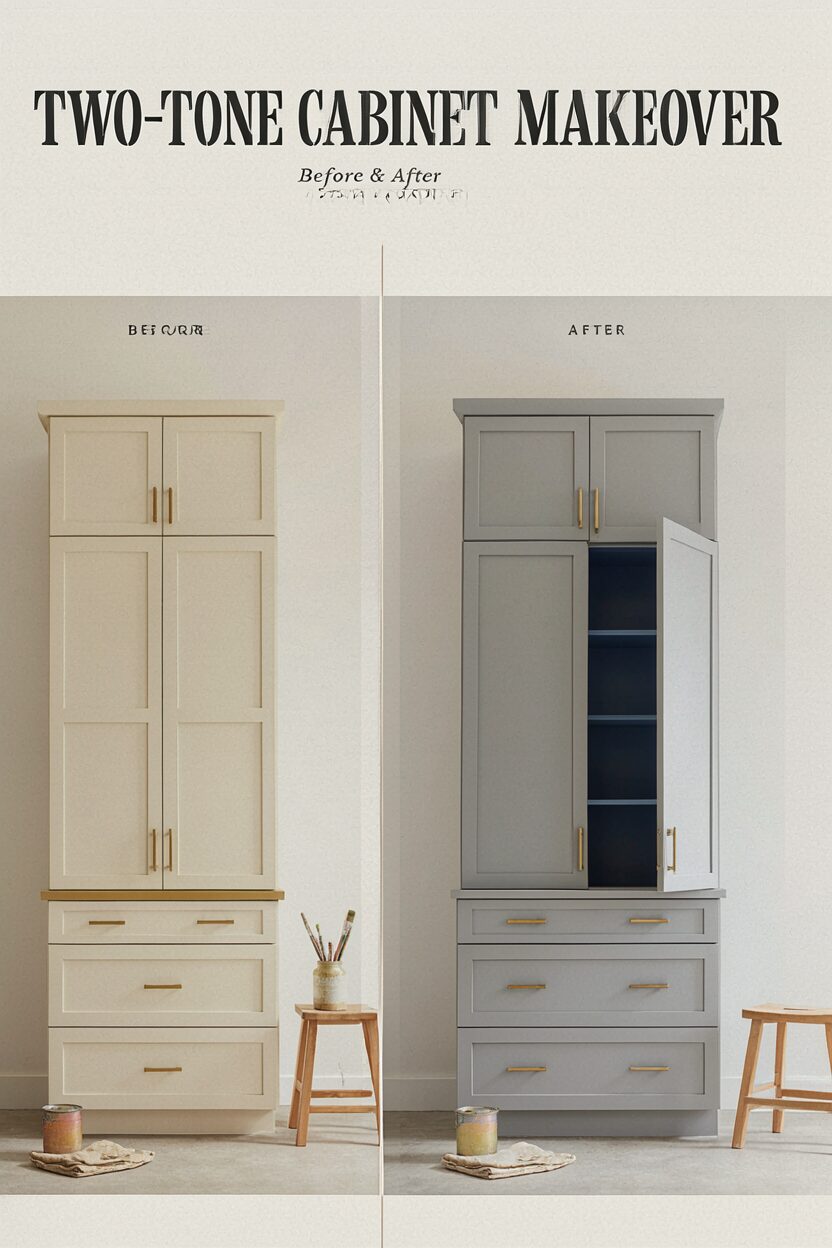
Two-tone cabinets can instantly make kitchens or craft spaces look design-forward. Tape off clean sections and paint the upper and lower areas in two complementary shades. The before look is often plain or dated, while the after look feels like a custom studio.
Make it unique by switching the “anchor” color in a surprising way, like painting the inside shelves a fun contrast. Add a thin trim detail or wood veneer strip for a high-end touch without complex carpentry. Consider a satin finish to balance durability with a light-catching surface.
For practical tips, remove doors for easier painting and number them so reassembly is simple. Lightly sand before painting and use primer if the old finish is glossy. Cost can stay reasonable by using paint instead of replacing doors, and by choosing one accent color rather than many.
Current trends often favor warm neutrals paired with deep accents, like cream with olive or soft gray with navy. If your cabinets are already neutral, a bold two-tone can be the easiest “wow” update. Just be sure the colors match your flooring or backsplash undertones.
4. Painted Wood Picture Frame Gallery Wall

Give plain frames personality by painting them in a single cohesive color. Try matte black for a modern vibe or soft white for a bright, airy feel. This change is small, but it can make your entire wall look curated.
Mix frame sizes for visual rhythm and use the same paint so everything looks intentional. If you want extra uniqueness, paint only the inner edge or add a thin metallic line at the corners. Keep cost low by buying inexpensive frames at a discount store and upgrading them with paint and clear sealant.
5. Decoupage Tabletop With Protective Laminate
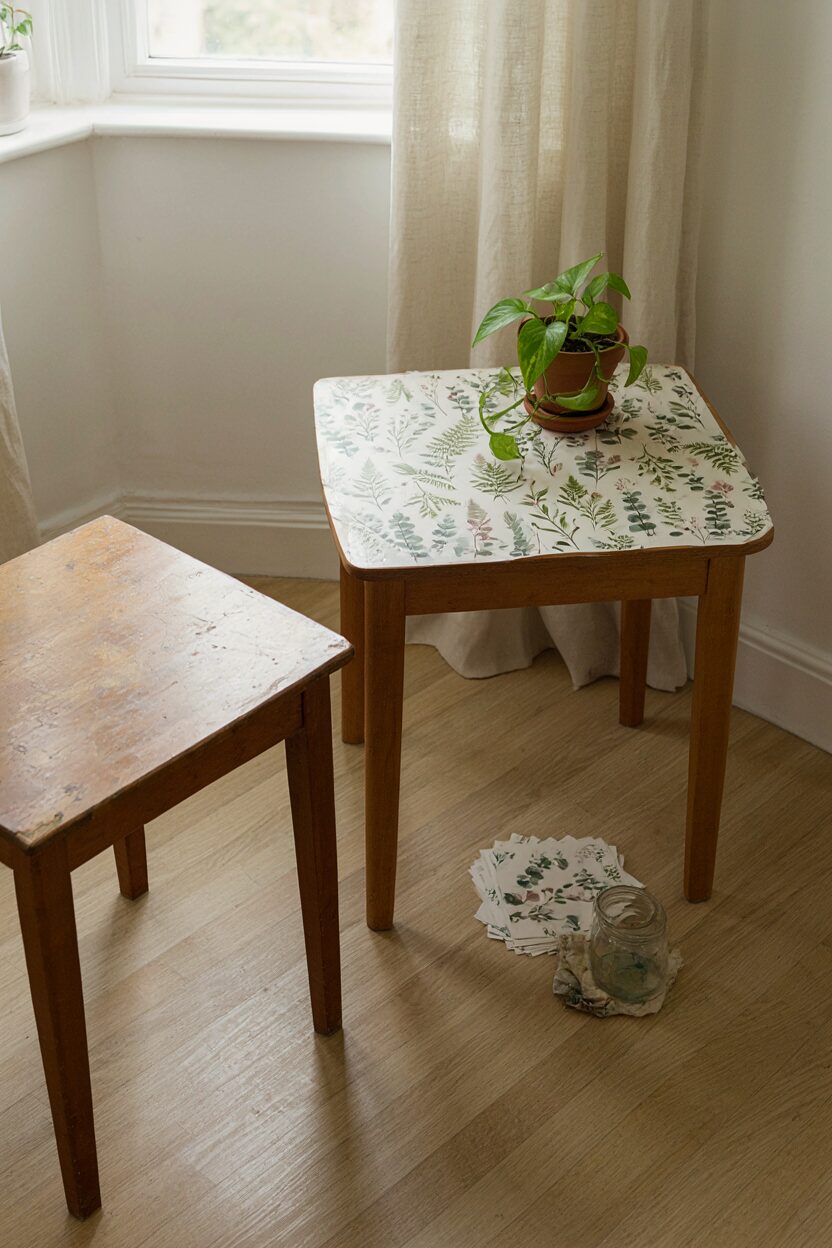
Decoupage can turn a scratched side table into a statement piece. Choose a pattern that matches your style, like botanical prints, vintage maps, or simple geometric paper. The before surface may be worn, but the after tabletop can look layered and artistic.
To make it practical, apply a decoupage medium in thin coats and seal it between layers so the paper doesn’t lift. Finish with a clear protective layer, such as laminate contact sheet or a tough topcoat. This step is what keeps your makeover from peeling after everyday use.
For personalization, combine two paper styles in a controlled way, like matching corners or using a solid border. Budget tip: buy small sheets and use what you need instead of large expensive packs. A trend right now is “playful collage,” where furniture looks creative but still neat, not messy.
6. Stencil a Rug-Style Pattern on a Coffee Table
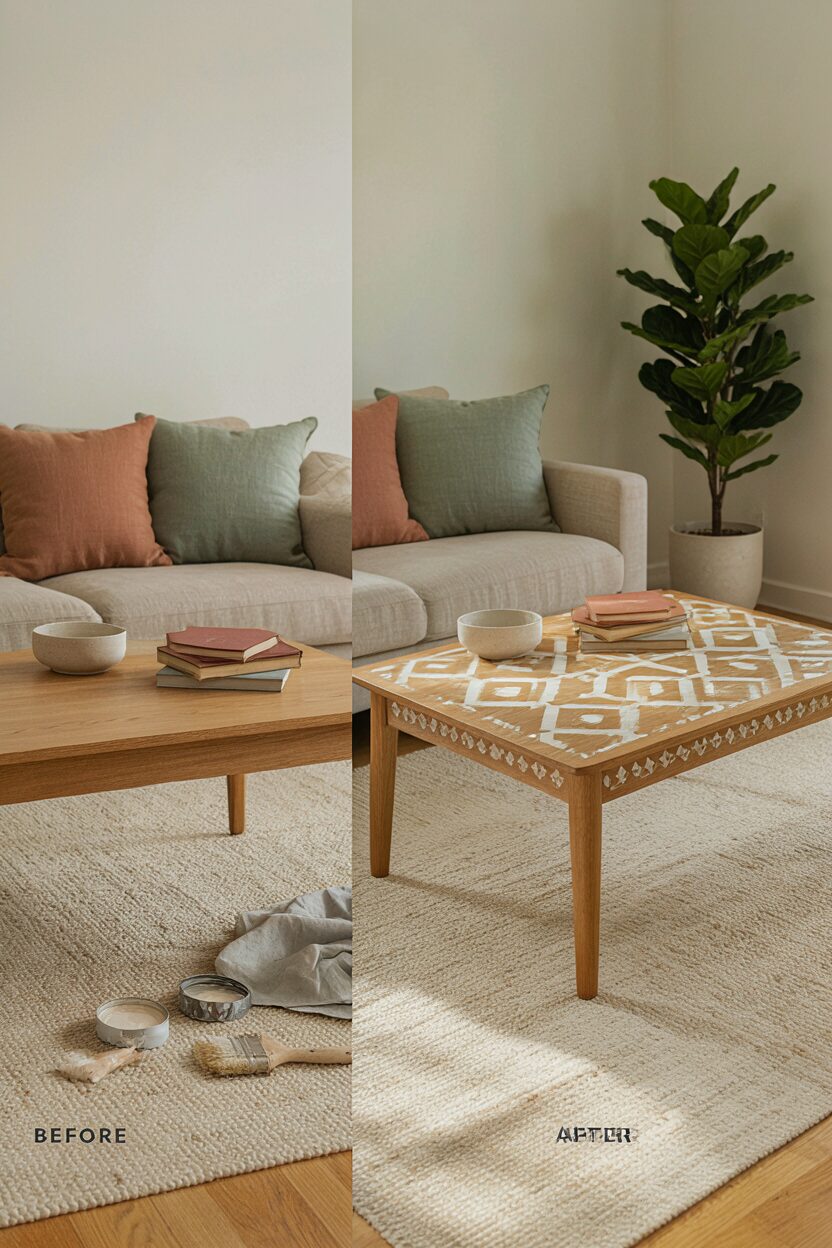
Stencil work is a great way to add pattern without full repainting. Use a stencil designed for furniture and paint with a foam brush for crisp edges. The before coffee table may look plain, but the after piece feels like it has a designer rug pattern built in.
Keep it unique by choosing a pattern scale that fits the tabletop, like larger motifs for a wide table and smaller repeats for a narrow one. Let each stencil section dry before moving on so colors stay clean. For tips, tape the stencil down lightly and re-press edges every few passes to avoid smudges.
Cost considerations are friendly because stencils are often cheaper than replacing furniture. If you already have paint, you’ll only need sealant and small tools. Trends show a rise in “graphic neutrals,” so try off-white lines on a warm wood base for a stylish, timeless look.
7. Replace Cabinet Legs for a Floating Look

A quick hardware change can change the whole vibe. Swap heavy old legs or blocks for slimmer tapered legs that lift the piece off the floor. Your before cabinet or bench will suddenly look lighter, more modern, and easier to style.
To make it practical, use the right screw length and double-check weight support. If you’re worried about wobbling, reinforce the mounting area inside. This makeover is unique because it changes both appearance and visual space, making the room feel bigger.
Personalize by choosing legs in the finish you love, like oak, walnut, or matte black metal. Budget-friendly tip: search for “furniture feet” online or at hardware stores instead of buying an entire new base. If your piece is older, this also helps it blend with current mid-century and modern trends.
For a polished after, paint or stain the leg area to match the body. Clean and prep the top surface so the new feet sit flat. If you want an extra step, add felt pads to protect floors.
8. Update Nightstands With Drawer Liner and Fresh Stain

Nightstands can look new when you upgrade both the outside and the drawer feel. Lightly sand the finish and apply a stain that warms or cools the tone to match your room. In the after photo, the wood grain will stand out, and the piece will look intentional again.
Choose modern drawer liner patterns like subtle stripes, solid linen, or small dots. This unique detail makes daily use feel more satisfying, even though it’s hidden. For practical tips, remove the drawers, measure carefully, and trim liner with a sharp craft knife.
If your nightstand is missing a step or two, fill old dents with wood filler and sand smooth before staining. Cost stays low compared to buying new furniture, especially if the frame is still sturdy. A current trend is warm, natural wood with simple styling, so keep the design clean with minimal hardware changes.
9. Revive a Bench With New Seat Padding and Fabric

A bench makeover can be both pretty and comfortable when you refresh the seat. Remove the old fabric, check the padding, and add foam that matches how firm you like it. The before bench might look flat, but the after version becomes a cozy spot for shoes, bags, or relaxing.
Make it unique by choosing durable fabric that matches your lifestyle, like indoor-outdoor weave or washable performance textiles. Add decorative nailhead trim or contrasting piping for a tailored look. Use a staple gun and pull fabric tight for clean corners and smooth edges.
For practical tips, keep the old fabric as a template for cutting replacements. Measure twice, and leave extra material so you can adjust as you staple. If cost is a concern, buy fabric by the yard during sales and use foam sheets efficiently by cutting carefully.
Trends right now include earthy textures and subtle patterns, like boucle-inspired looks and woven stripes. Even if you keep the bench color simple, the seat fabric can become the main “after” focal point.
10. Color-Blocked Wardrobe With Peel-and-Stick Panels
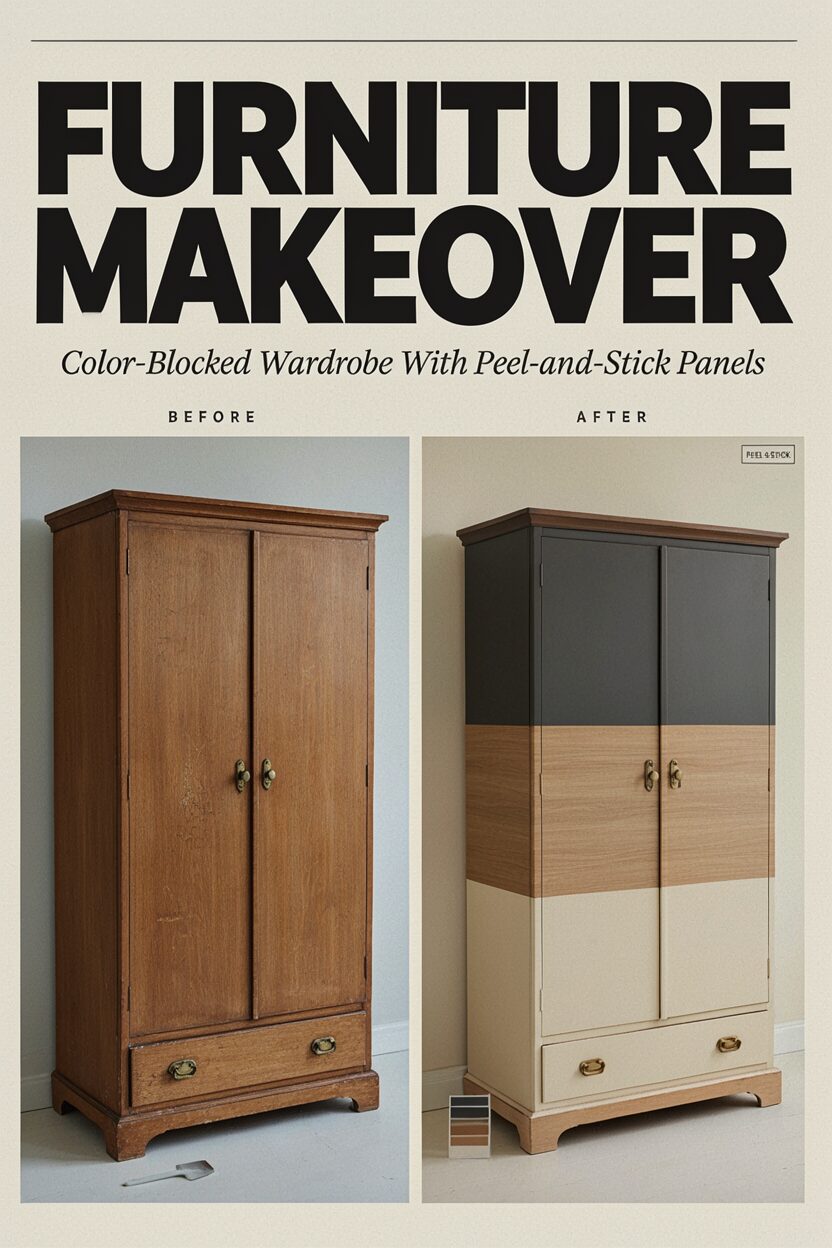
If you want an easy makeover with low commitment, peel-and-stick panels are a smart choice. Apply panels in bold sections to cover scratches or outdated paint. The before wardrobe may look worn, while the after looks like a styled design project.
Choose materials that work on furniture surfaces and can handle normal cleaning. This makeover is unique because you can remove or replace panels if you change your mind later. To personalize, mix finishes like matte and light wood-look panels for depth.
For practical tips, clean the surface thoroughly and smooth panels with a plastic tool to avoid bubbles. Start with a level guide line so edges stay straight. Cost can be budget-friendly because you’re using adhesive coverings instead of paint and new parts.
11. Spray-Paint Metal Side Table to a Sleek Finish

Metal side tables often look tired from rust spots or faded color. Clean the surface well, sand away rough areas, and spray with a rust-resistant primer first. Then apply a smooth topcoat so the after piece looks sleek and even.
Make it unique by choosing a finish like satin nickel, warm bronze, or deep forest green. Add a protective clear coat if the table gets outdoors light or frequent touch. For practical tips, spray in thin layers and let each coat dry fully to reduce drips.
Cost considerations are usually low because you can refresh a whole table with spray paint and primer. If you already have paint at home, you only need prep supplies. A current trend is “dark modern metal,” so darker hues look especially sharp against light walls.
If you want extra personalization, replace the center finial or add small decorative feet. Just keep the style consistent so it doesn’t feel random.
12. Limewash Look on Old Wooden Bookshelf
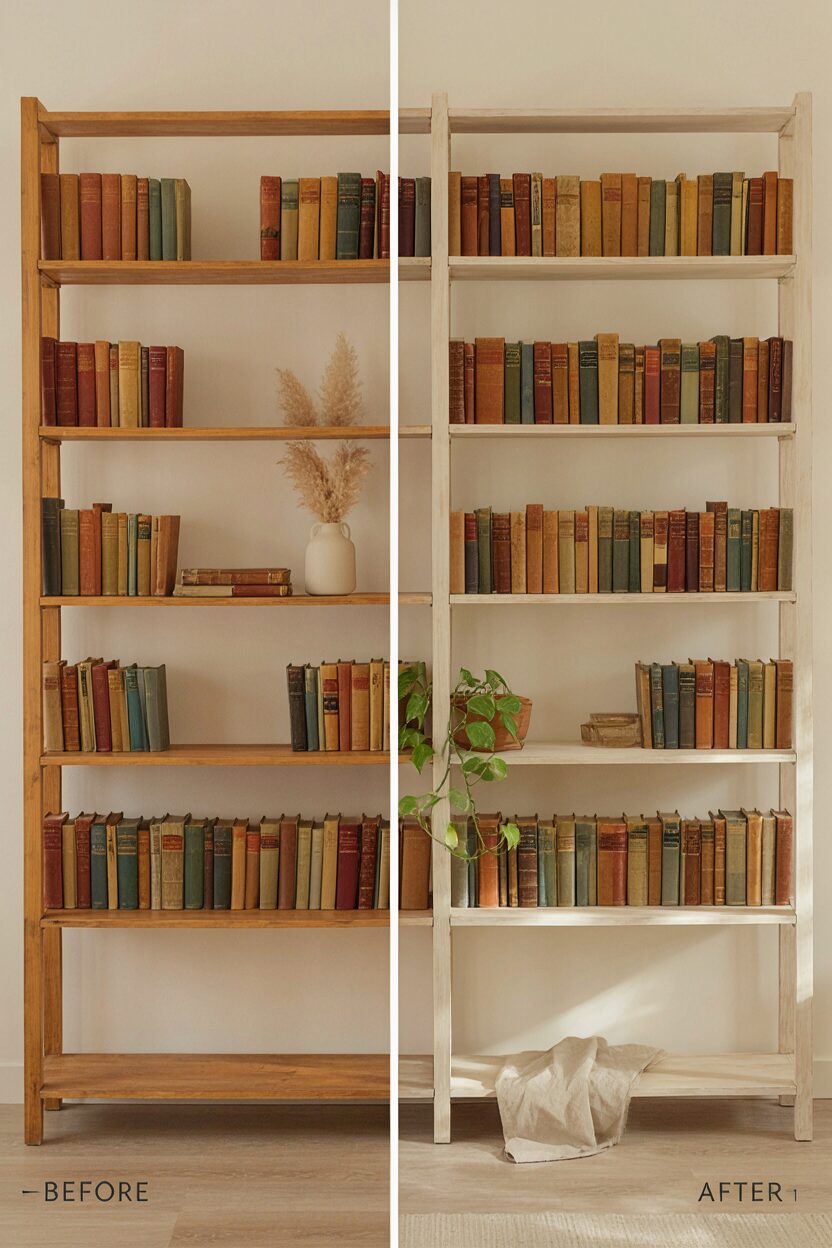
Limewash style paint can give a bookshelf a soft, textured glow. Use a technique that leaves subtle variation so it feels natural rather than flat. The before shelf might be heavy and yellowed, but the after look will feel airy and fresh.
To make it practical, apply in thin passes and wipe back where you want more wood showing. This texture makes the piece unique, and it also hides small imperfections. If your shelves hold books, finish with a gentle protective coat that won’t yellow.
Cost is often manageable because you’re using paint, a brush, and a simple method. Personalization ideas include choosing a warm white tone for bright rooms or a pale gray for modern spaces. Trends right now favor “authentic textures,” and limewash is a great match for that look.
13. Replace Handle Style on a Dresser for Instant Face-Lift

Sometimes the best makeover is a small, strategic swap. Replace old drawer pulls with new shapes, finishes, and styles. The before dresser feels dated, while the after dresser looks updated just by changing the way it “reads” visually.
Make it unique by mixing two finishes lightly, like matte black pulls with brass accents, or using curved pulls for a softer look. For practical tips, measure hole spacing carefully so new hardware fits without extra drilling. Use a template or a piece of cardboard to double-check alignment.
Cost considerations are friendly because hardware is often cheaper than paint and can be done quickly. To personalize, match the pulls with your cabinet hardware in the room. A trend worth watching is cleaner, simpler hardware lines that look minimal but still premium.
If your old holes don’t line up, consider using hardware covers or a small wood filler patch before installing the new pulls. That small step keeps the after surface looking smooth.
14. Add Peel-and-Stick Wallpaper Back to an Open Shelf
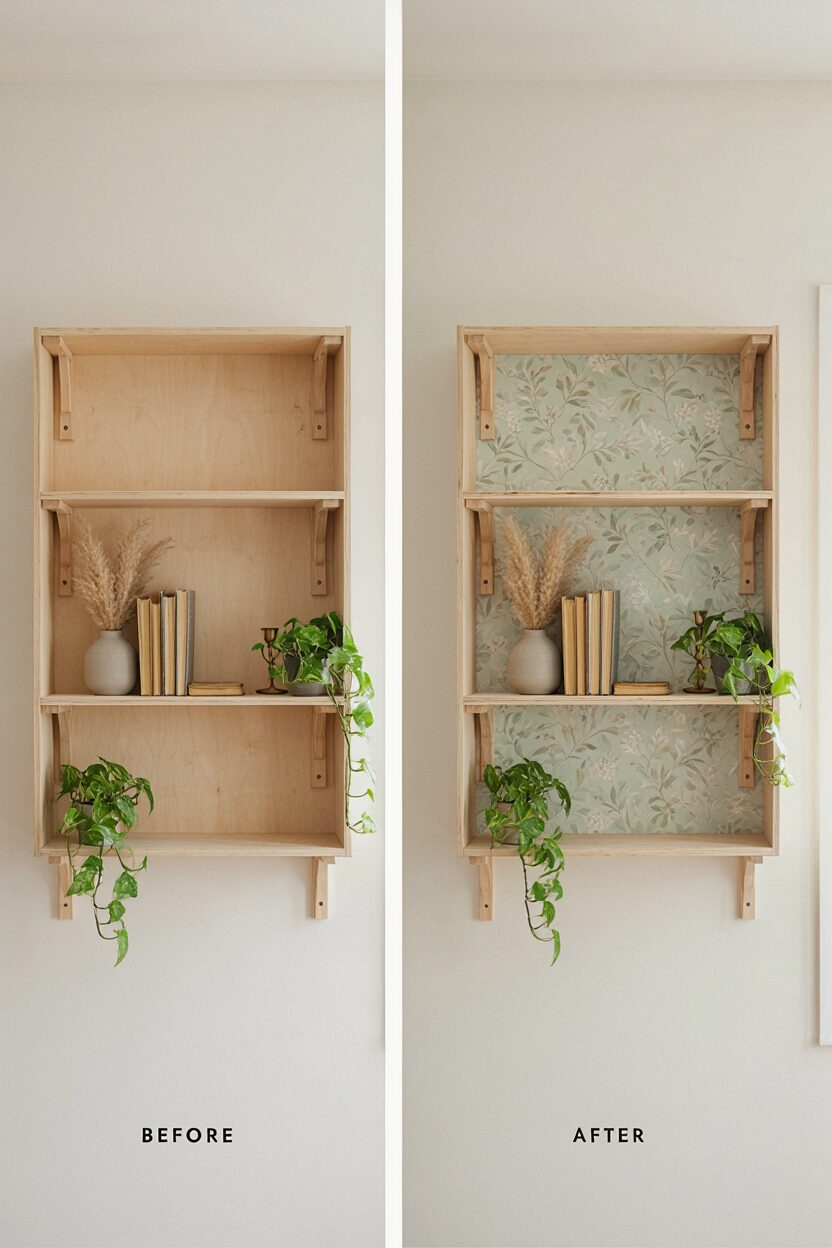
Open shelves can look unfinished until you add a backdrop. Line the back with peel-and-stick wallpaper to create a pop of color or pattern. The before shelf feels flat, while the after shelf looks like a styled display.
For best results, clean the surface, smooth out wrinkles, and cut around shelves and brackets carefully. This makeover is unique because it changes the “depth” of the shelf without touching the structure. Personalize with a pattern that matches your room theme, like soft florals, subtle texture, or modern stripes.
15. Danish-Style Stain and Clear Topcoat on a Vintage Table

Vintage tabletops often have great bones but need tone and protection. Sand lightly, choose a stain that matches your desired warmth, and finish with a clear topcoat. The before piece may look dull, but the after will show richer grain and a stronger sheen.
Keep it unique by layering your finish, using an oil-based approach for a hand-rubbed look. Apply evenly and let it cure fully before setting items on top. This also helps the table resist small spills from everyday life.
Cost considerations are usually moderate since sanding supplies and stain can add up, but it’s often still cheaper than replacement. Personalization ideas include choosing a darker “walnut” tone for drama or a lighter “oak” tone for a brighter room. Trends currently lean toward warm wood with natural variation, and Danish-style finishes deliver that look.
To make it practical, wipe the surface between coats and avoid thick patches that can look sticky. Test your stain on a hidden spot first so you don’t get surprised by the final color.
16. Upholster a Headboard With Button Tufting

A headboard can instantly upgrade a bedroom, especially when it’s newly upholstered. Remove the old covering, add batting, and pull fabric tight for smooth lines. The before headboard may look plain or worn, and the after version becomes a soft focal point.
Make it unique by adding button tufting or a simple channel stitch pattern. Tufting creates visual depth and makes the piece feel custom. For practical tips, map your button points carefully and use a strong needle tool so buttons sit evenly.
17. Paint a Desk Top With a Durable Chalkboard or Color Finish

Desks can feel tired when the surface is scratched or inconsistent. Paint the top with a chalkboard-style paint or a hardwearing furniture paint, then seal properly. The before desk might look clutter-friendly only because it’s worn, while the after desk looks tidy and intentional.
To make it unique, pick a color that supports your work mood, like deep green for focus or muted blue for calm. Add a matching tray or organizer so the new finish looks purposeful. For practical tips, keep the first coat thin and allow full cure time to prevent scratches.
Cost considerations are moderate, mainly depending on paint type and sealant. Personalization ideas include stenciling your initials or adding measurement lines for craft use. Current trends favor maker-friendly furniture, where workspaces look stylish but also useful day to day.
18. Tile or Mosaic Accent on a Side Table Edge

A side table becomes special when you add small tile details. Choose mosaic tiles and apply them along the edge or as a small inset panel. The before table may feel generic, while the after looks like a boutique find.
Make it practical by using tile adhesive rated for the surface and sealing grout well. This unique look holds up well when sealed, and it’s eye-catching without covering the whole piece. For tips, plan the layout first and leave space for grout lines so the pattern stays clean.
19. Refresh a Bookcase With Crown Molding and Stained Trim

If your bookcase looks simple but a bit unfinished, molding can add instant elegance. Attach crown molding or trim strips to the top and add stained accents to match the wood. The before shelf feels basic, while the after feels built-in and polished.
To personalize, choose trim shapes that match your style, like clean modern lines or slightly curved classics. This makeover is unique because it adds architectural detail without needing a full rebuild. For practical tips, measure carefully, cut accurately, and use wood filler to smooth seams before finishing.
Cost considerations vary, but trim is often cheaper than replacing the entire bookcase. Look for sales on molding and stain so you can keep spending under control. Trends right now include “built-in look” furniture, and trim makes that achievable for many types of shelves.
20. Stain-Then-Decals on a Cabinet Door for a Clean Pattern

Decals are a fun option when you want pattern without heavy painting. Start by cleaning the cabinet doors and applying stain or a clear finish if the piece needs tone. The before doors can look flat, while the after doors gain a crisp decorative detail that feels fresh.
To make it unique, choose decals that look like inlaid wood or subtle artwork, then seal over the decals for protection. This approach helps the design last through daily handling. For practical tips, align decals carefully with painter’s tape guides so corners stay straight.
Cost considerations are usually low because decals and a sealant can cost less than remodeling. Personalization ideas include seasonal decals you can swap, like simple icons or botanical motifs. Current trends often favor calm, minimal patterns, so choose decals that feel classy rather than loud.