Step outside and picture a patio that looks good, feels friendly, and stays practical. Small choices in shape, color, and borders can make a big difference.
Gravel patios are loved for their flexible style, easy upkeep, and ability to fit many budgets. With a little planning, you can build a space that matches your home and your daily life.
1. Compass-Point Gravel Layout With a Center Feature
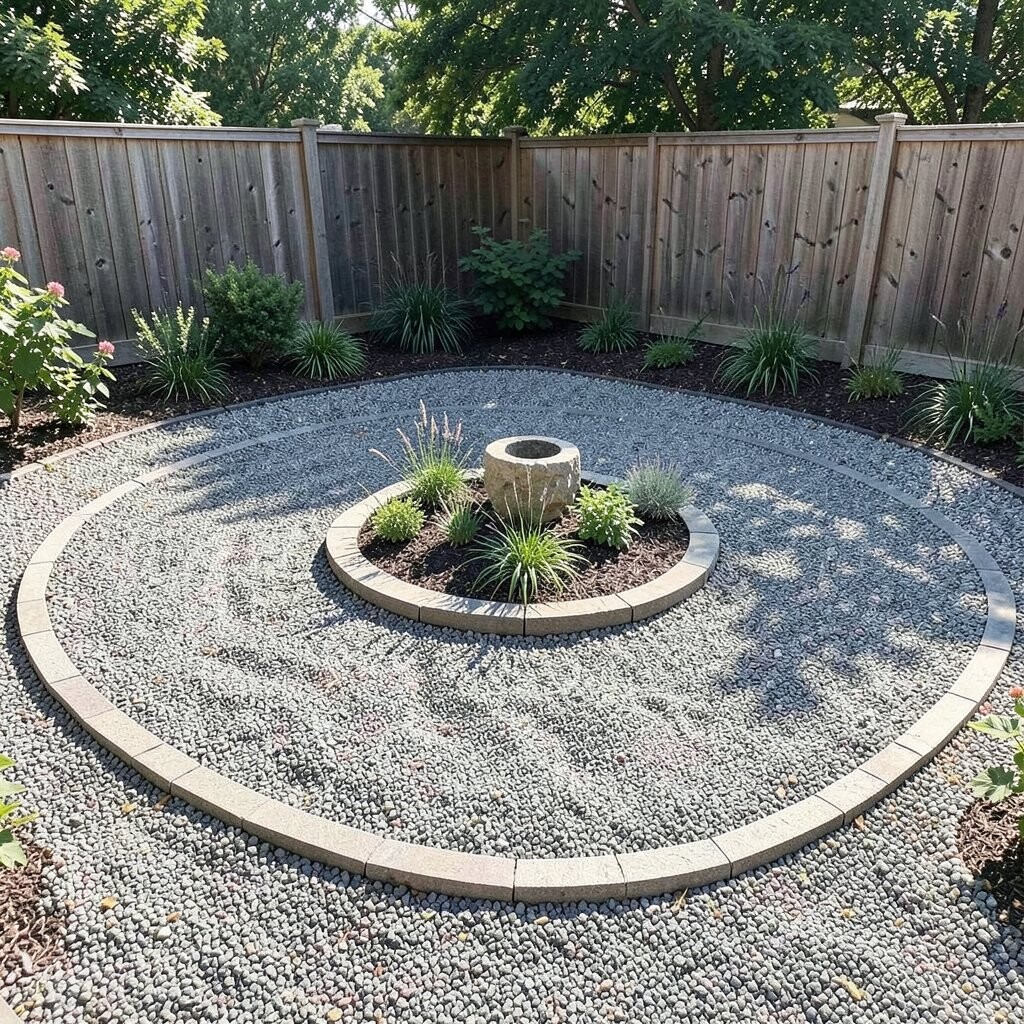
Start by marking a simple star or compass shape on the ground. Use a few different gravel shades so the center pops like a small “hub” for your patio.
Pick a center feature such as a round stepping stone, a potted statue base, or a fire-pit ring made for outdoor use. This style is visually strong and gives your patio a clear focal point. It also helps visitors understand where to walk, which feels safer and more organized.
2. Border Garden Bed With Gravel “Walkway” Inside

Build a gravel patio surrounded by a narrow garden bed that holds flowers and herbs. The gravel inside looks neat, while the plants add soft color and movement.
Choose plants that match your sun level, like lavender for dry areas or hydrangeas for shadier spots. This setup can reduce weeds and hides the edge of your patio layers.
Use edging material such as steel, brick, or pressure-treated lumber to keep gravel from spilling into the bed. Add a drip line under the plants if you want lower watering stress. If you want a personalized look, repeat one plant color in small clusters so the whole space feels planned.
3. Stamped-Look Gravel Path Around a Lounge Area

Instead of one flat surface, design a path that loops around your seating spot. You can guide the eye with curves, and you can make the area feel larger.
Try a “stamped-look” effect using gravel texture changes, such as smoother gravel in the path and slightly larger stones in the border. The visual difference feels like tile without the heavy cost. It also helps with traction since foot traffic stays on the parts you plan for walking.
Lay down a weed barrier first, then compact the base so the ground stays steady. Add a thin layer of sand if your stones shift too easily.
For cost planning, compare gravel types by price per bag or per yard, and only upgrade the areas you care about most. If you love color, pick a gravel that matches your house brick or siding so everything looks connected.
4. Small Gravel Patio With Built-In Bench Wall
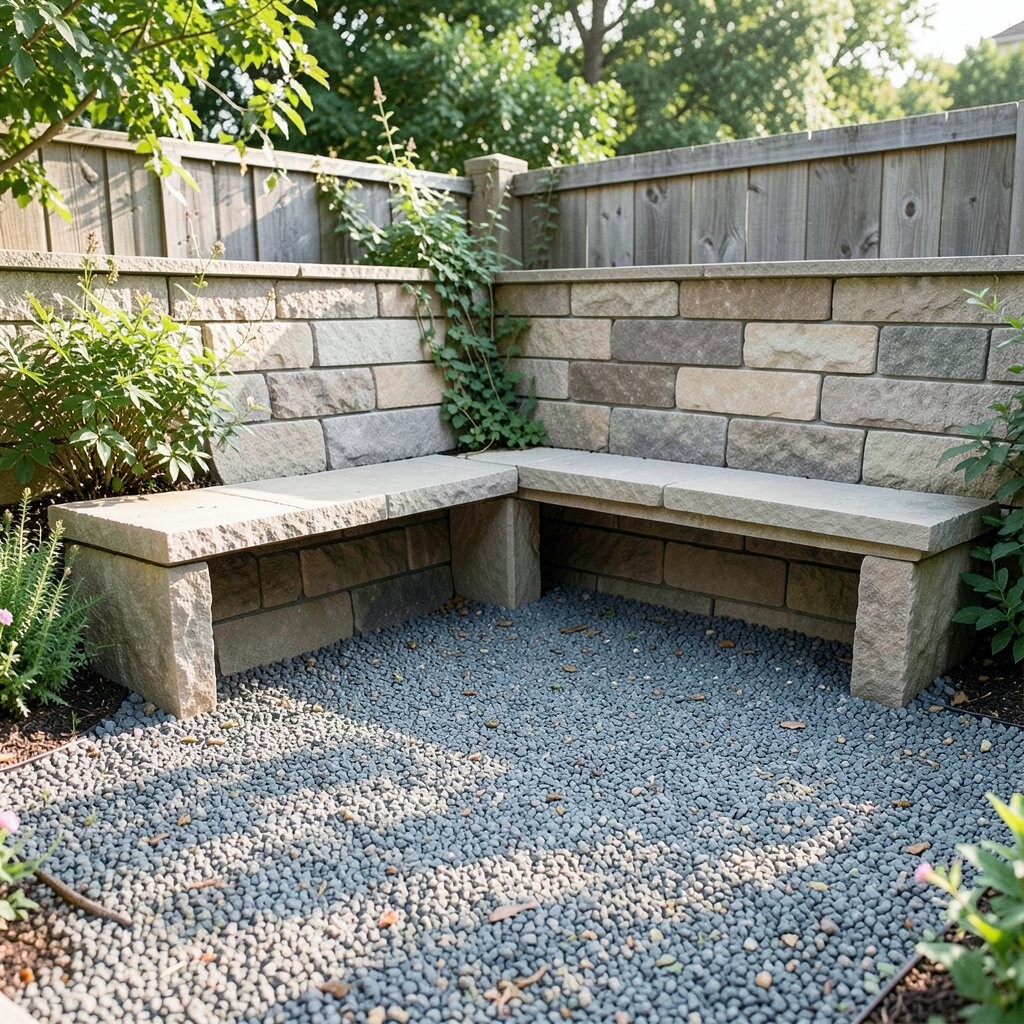
Create a cozy patio that feels like a little outdoor room. Build a low bench wall from stone, block, or stacked pavers, then fill the seating floor with gravel for comfort.
This idea is great for tiny yards because the bench gives storage space for blankets or outdoor cushions. It also turns “extra space” into a ready-to-use hangout spot.
5. Dark Charcoal Gravel With Light Metal Accents
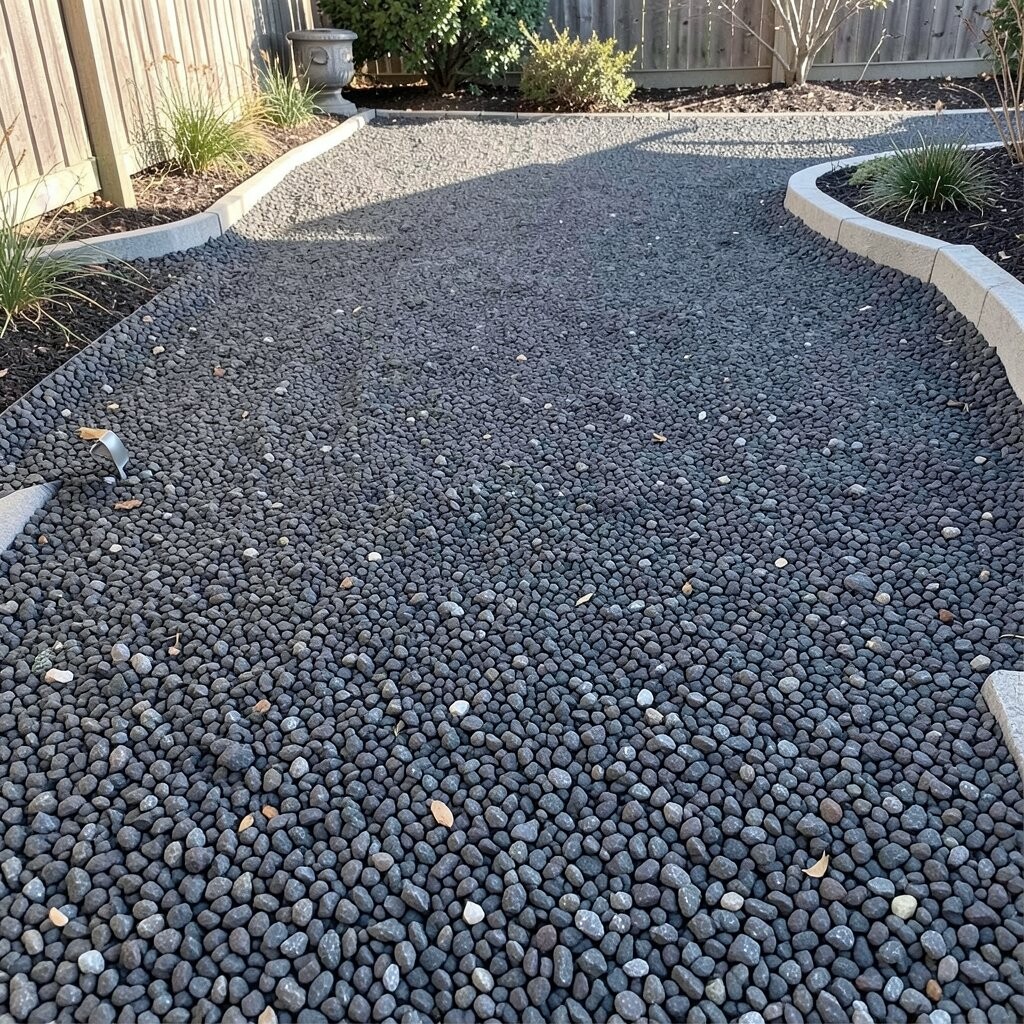
Choose dark charcoal gravel for a modern, calm look. Pair it with light-colored items like white planters, pale outdoor chairs, or a light metal lantern.
The contrast makes everything look crisp, and it can make your patio feel cleaner even with everyday use. Gravel also stays cooler than many solid surfaces during hot days.
Personalize by adding outdoor art in one corner, like a small sculpture or a flat wall sign. For cost, you can spend a bit more on edging and keep the main area a more budget-friendly gravel color.
6. Patterned Gravel Tiles Using Interlocking Frames
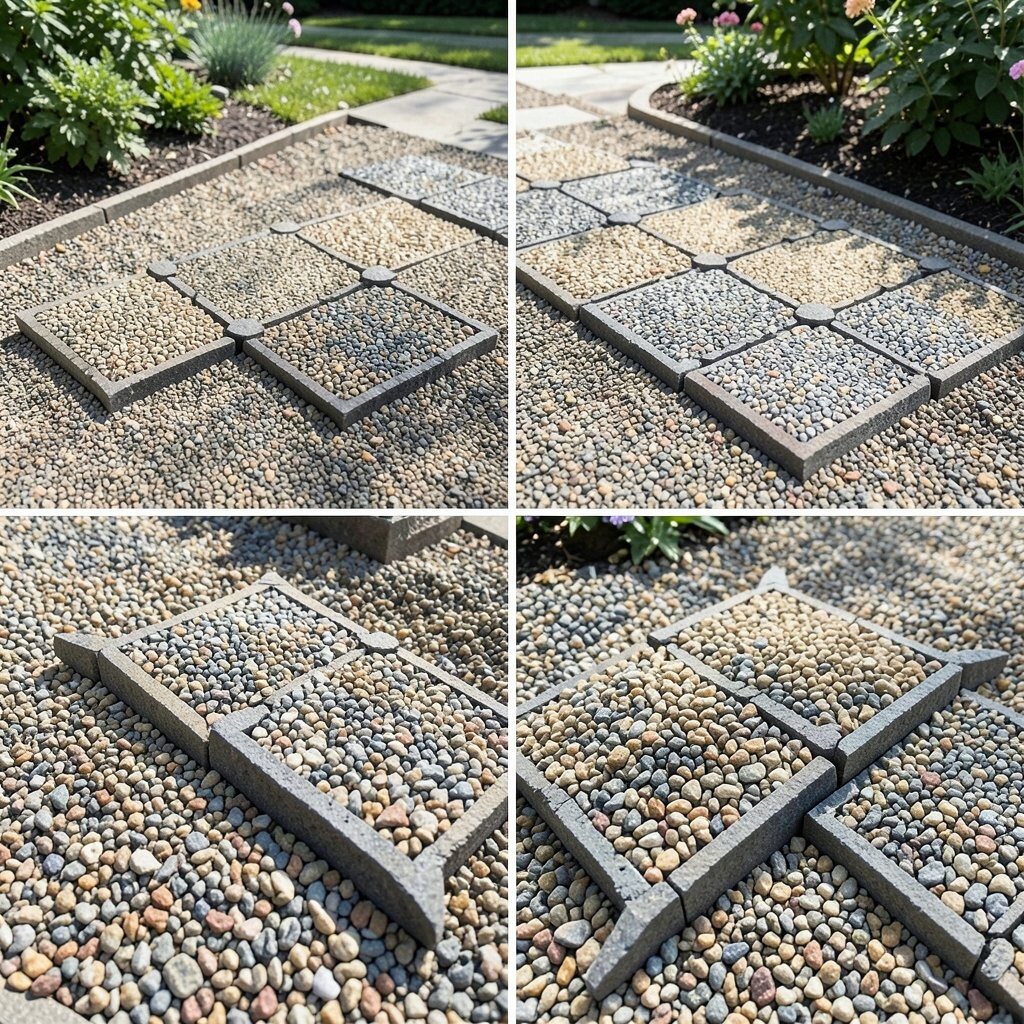
Use metal or plastic frames to create “tile” sections filled with gravel. Each section can be a different color, so the patio shows a pattern from above.
Frames help you keep lines straight, which makes the patio look sharper. You also get easier repairs because you can lift one section if a spot shifts.
For personalization, pick a pattern inspired by your home style, like stripes for modern homes or circles for softer vibes. Keep edges tidy with border stone and compact the base under every frame. Prices vary by frame type, so compare the cost against how often you want to update your design.
7. Gravel Patio With a Raised Border for Water Flow

Design your patio with a raised border that gently lifts the edges. This can help manage water and keep gravel from wandering.
A raised edge also makes the patio feel more “finished,” like it belongs with the house. It can be made from bricks, river rock, or stacked timbers.
To prevent muddy spots, add drainage fabric and slope the base slightly away from the house. If you want a current trend vibe, combine minimal borders with a clean, wide-open gravel surface. For cost, choose the border height that matches your needs and avoid overbuilding where you don’t need it.
8. Mosaic Border With Small Stone “Artwork”

Add a mosaic-style border made from small stones or pebbles. You can create a simple line pattern or a small shape, like a sun or wave.
This project gives your patio a signature look that feels handmade. Gravel gives you flexibility while the border adds detail, making the whole space look custom.
Plan your design on paper first, then use chalk to outline it on the ground. Set the border pieces carefully so they stay in place when you add the main gravel.
Cost can stay reasonable because you only need premium stones for the border. Personalize by using colors pulled from your front door, outdoor cushions, or a nearby walkway.
9. “Barefoot Friendly” Gravel With Soft Underlayer
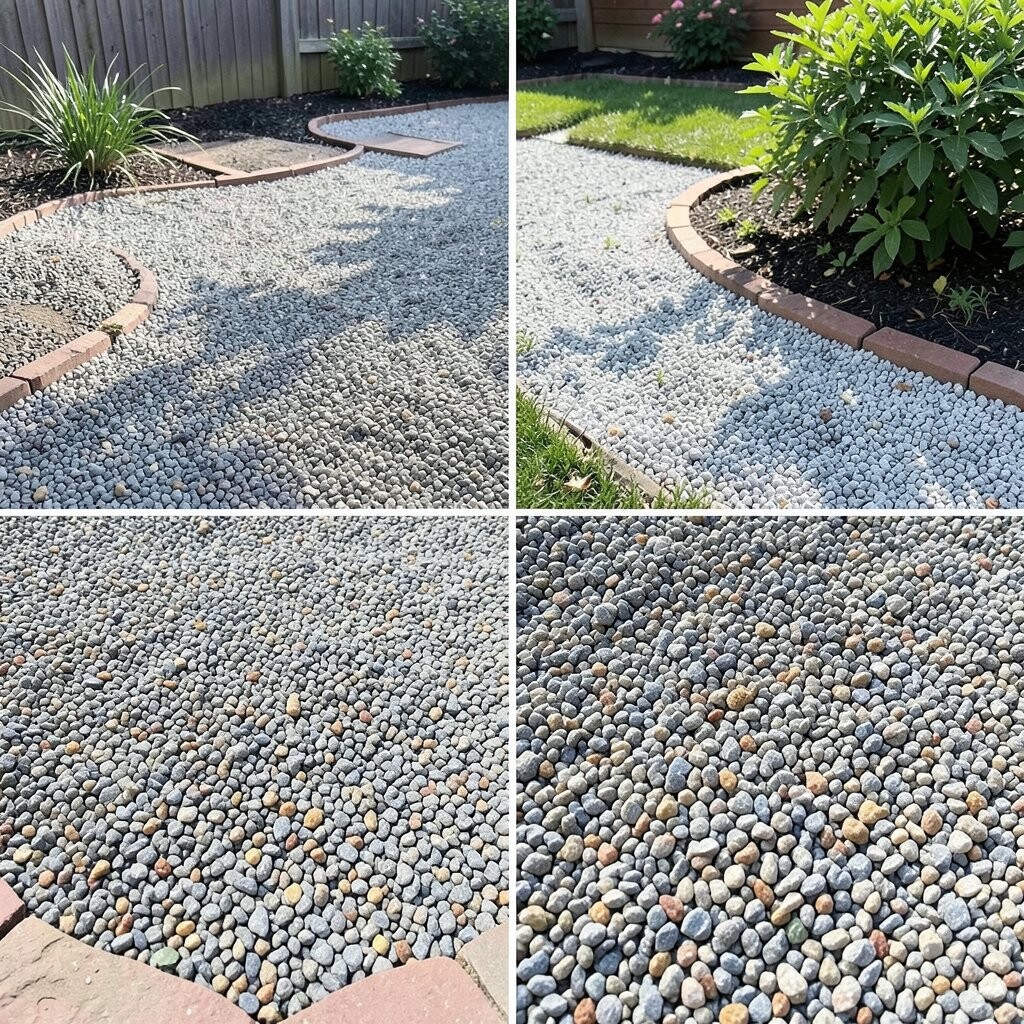
If you like walking outside in sandals or even barefoot indoors, choose a gentler gravel feel. Add a smooth underlayer and keep stone size moderate so the surface feels more comfortable.
This makes your patio more inviting for morning coffee and lazy evenings. It also helps reduce the chance of stones sticking to shoes and tracking inside.
10. Outdoor Dining Zone With Gravel Around a Table Base

Place your dining table on a gravel patio and frame the table with a neat gravel “ring.” This trick keeps the area open while giving the space a clear dining identity.
It is easy to personalize with placemats, colored cushions, and a matching outdoor rug that sits under the seating. Gravel also helps with cleanup since spills can be wiped and stones dry quickly.
For tips, use a weed barrier and make sure the base is compact under where legs land. Cost can be managed by focusing your best gravel on the dining ring and using a simpler mix for the larger border area.
11. Pergola-Style Shade Corner With Gravel Base

Build a shade corner under a pergola, trellis, or small canopy. Fill the patio floor with gravel so heat doesn’t feel trapped like it can on solid floors.
This idea is great for sunny yards and gives you a natural place for plants. Use climbing vines or hanging planters to add height and privacy without blocking light.
For personalization, choose a trellis pattern that matches your garden style, like straight lattice or airy arches. When budgeting, consider anchoring supports well since gravel areas need firm footing. You can also mix gravel colors to create a subtle path from the door to the shade zone.
12. Gravel Patio With Stepping Stones in a Straight Line
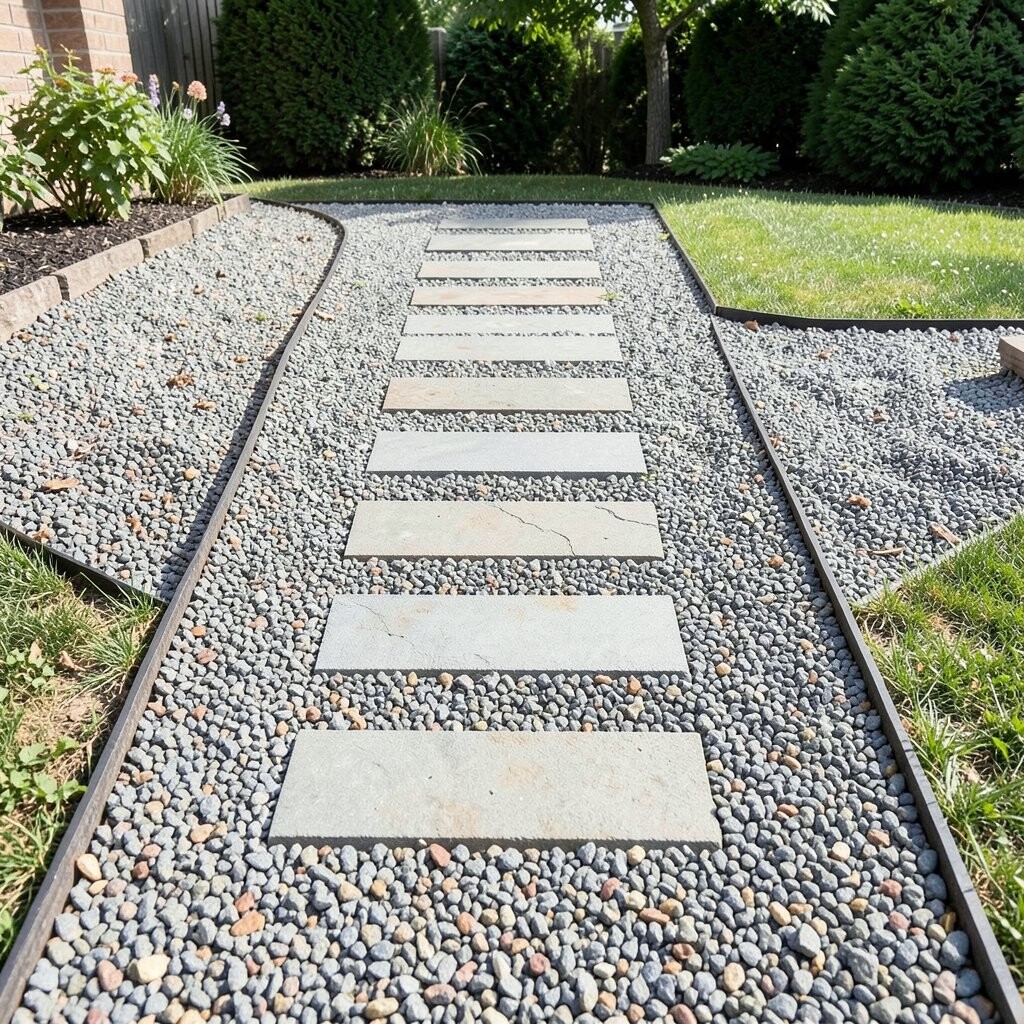
Lay stepping stones through the gravel to create a clear walking route. Keep the stones spaced for comfortable strides and make the line guide people naturally.
This looks neat and can make your yard feel more like a designed space. It also protects the surrounding gravel from heavy foot wear in one specific zone.
Try different stone finishes, like smooth bluestone-look pavers or textured concrete slabs. For cost, use larger stones only in the areas people step often, and fill the rest with a standard gravel mix. Personalize with a few stones that match your home colors or outdoor wall accents.
13. Layered Gravel Ridges for a Sculpted Look

Instead of one uniform layer, create gentle ridges in the gravel. You can shape the ridges with a rake, and you can repeat them like waves.
This sculpts the surface and makes the patio look more artistic than basic gravel. The ridges also guide water and can reduce puddle spots if you design them with the right slope.
Use a deeper base layer and compact it, then build up the ridges slowly. Keep the edge borders strong so the shaped surface stays put.
Current style trends often show “soft geometry,” so rounded ridges can feel modern and calming. Budget-wise, you may use more gravel for taller ridges, so aim for a small section first if you want to keep costs steady.
14. Fire-Pit Ring Border With Heat-Ready Gravel

Put a fire pit or chiminea in the middle and frame it with gravel designed for outdoor use. The border helps control the area where heat and movement happen most.
This is a cozy, evening-friendly setup that makes your patio the heart of your yard. Just remember to follow safe spacing rules and choose a heat-tolerant approach for the surrounding surface.
15. Rounded Gravel “Courtyard” With Soft Curves
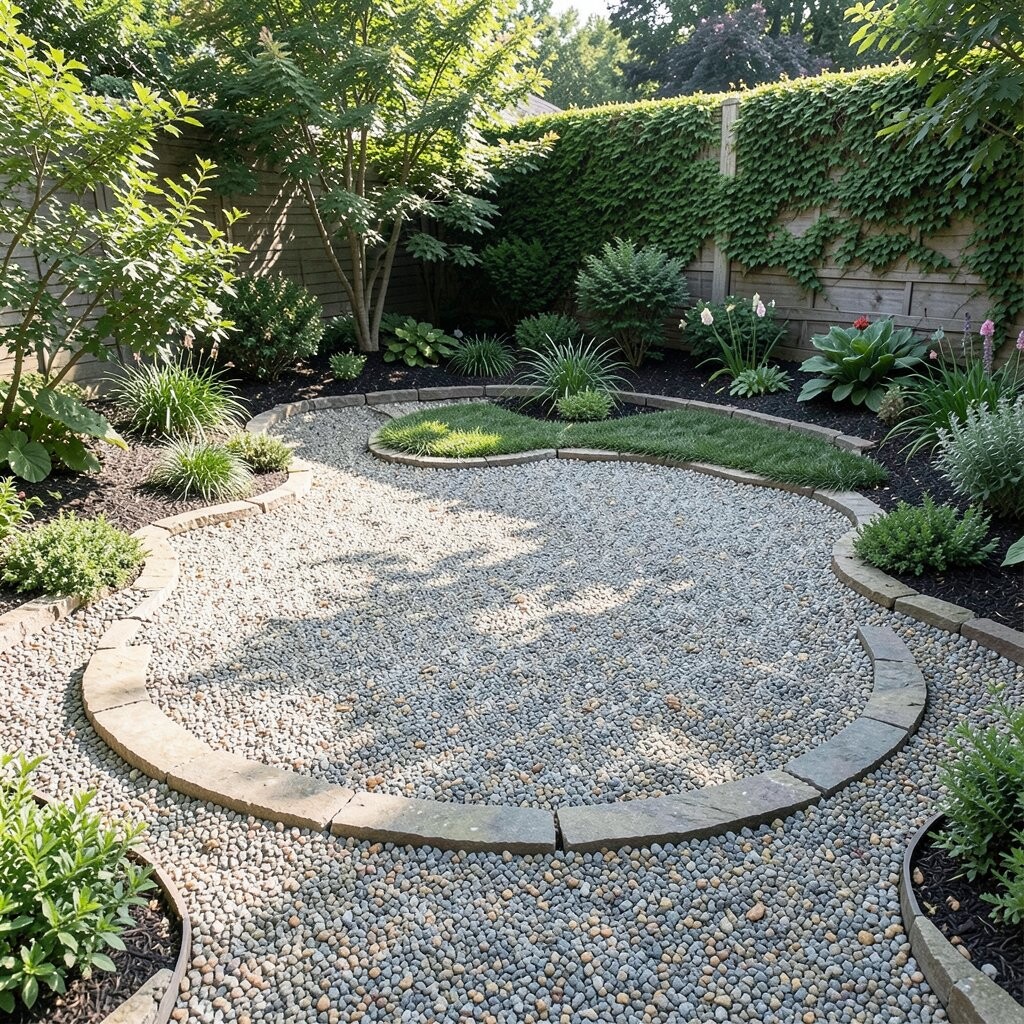
Make your patio shape like a gentle oval or circle. Rounded edges look friendly, and they soften the look of a straight driveway or fence line.
Gravel works great for curved designs because it can fill small gaps smoothly. This makes your courtyard feel custom even if you keep the layout simple.
For personalization, add a curved border of bigger stones and plant shrubs just beyond it. Cost can be managed by limiting extra decorative materials to the edge, where they show the most.
16. Gravel Patio With Outdoor Rug “Dock” Placement

Plan gravel first, then add an outdoor rug that sits in a “dock” of bordered gravel. The border keeps the rug from shifting and gives the area a styled, finished look.
This helps your seating zone look like a living room while still benefiting from gravel drainage. It is also easier to swap rug colors for seasons, since the base stays the same.
Personalize by matching rug tones to your planters or patio cushions. Budget-friendly tip: pick one quality rug and rotate it, and keep decorative changes in the rug and pillows instead of the whole patio.
17. Mini Water Feature Edge With River Rock Blend

Place a small bubbling feature, bird fountain, or pond-adjacent container near the patio edge. Use river rock and smooth gravel around it so the water area looks natural.
This creates a calming sound and gives your patio a relaxing “destination” feeling. The stones also help protect the soil around the feature.
For personalization, choose a finish for the water feature that matches your metal decor, like bronze or black. Cost considerations: focus premium stones near the feature and use standard gravel farther out. If you want easy maintenance, keep tubing hidden and choose a pump designed for outdoor splash zones.
18. Gravel Patio With a Color-Shift Path From Door to Seating

Create a path that changes color slowly as it moves from your door to the seating area. Start with a lighter tone near the entrance and move toward deeper color near the lounge spot.
This look feels modern and intentional, and it can guide people without needing signs. The color shift also helps show where to place furniture so the layout stays organized.
To make it work, keep the border straight and measure the width of the path. Add a thin sand layer under the stones if you want smoother transitions.
Trends right now favor layered textures, so mixing pebble sizes slightly can add a stylish feel. For cost, you can buy one mid-range gravel for the full area and reserve a premium color mix for the path width only.
19. Gravel Patio With Privacy Planters in Strategic Corners
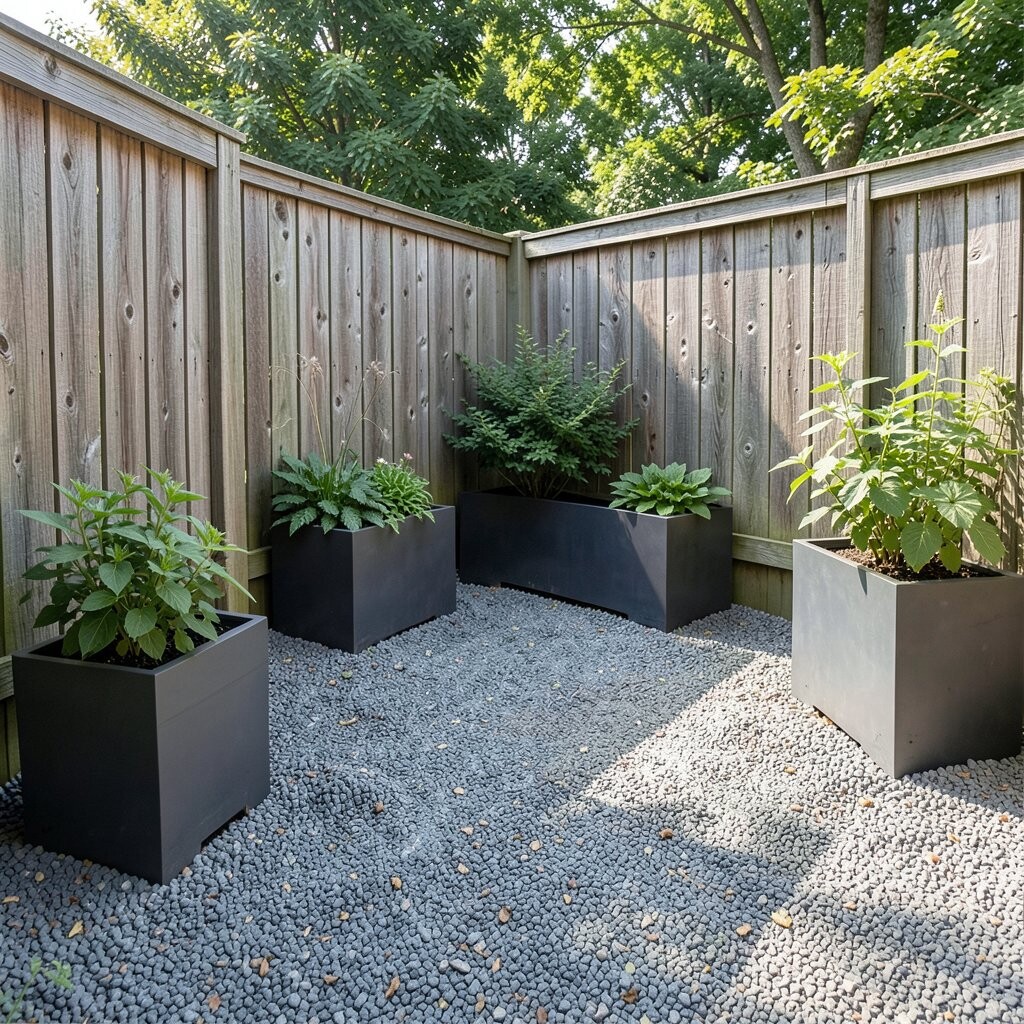
Use tall planters or stacked raised troughs in corners to create privacy without closing the space. The gravel floor keeps the patio airy, even when you add greenery.
This corner setup makes your outdoor space feel calmer and more “yours.” Personalize by planting grasses, small trees, or flowering shrubs that match your color mood.
20. Night-Friendly Gravel With Warm Low Lighting
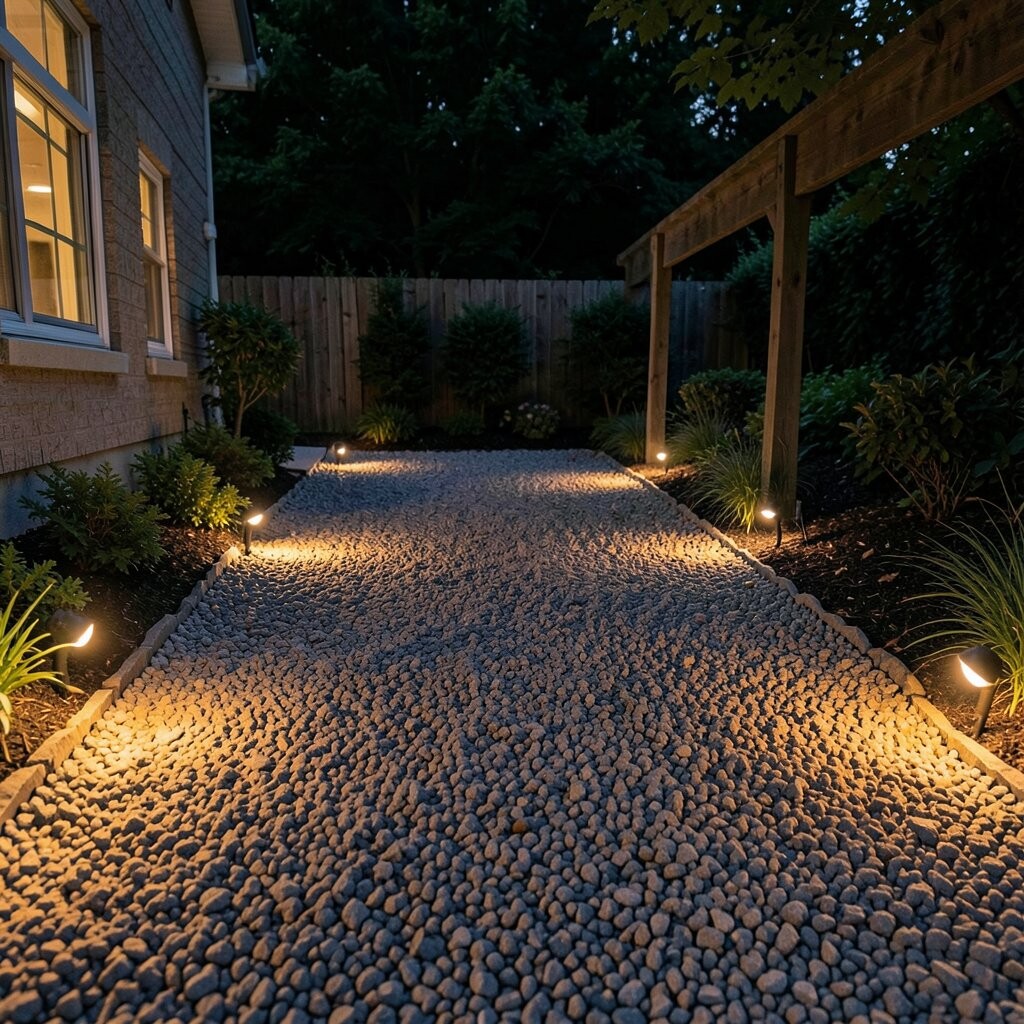
Make your patio inviting at night by adding low, warm lights along borders or near stepping stones. Gravel helps lighting shine softly because the surface reflects gently.
Choose pathway lights with warm bulbs for cozy evenings. This setup also improves safety by showing where to walk.
To personalize, place lights at a few “story moments,” like the garden bed edge or near the fire pit. For cost planning, start with a small number of fixtures and expand later, since gravel patios are easy to wire and adjust around.
21. Repurposed Material Edge: Brick, Slate, or Old Pavers
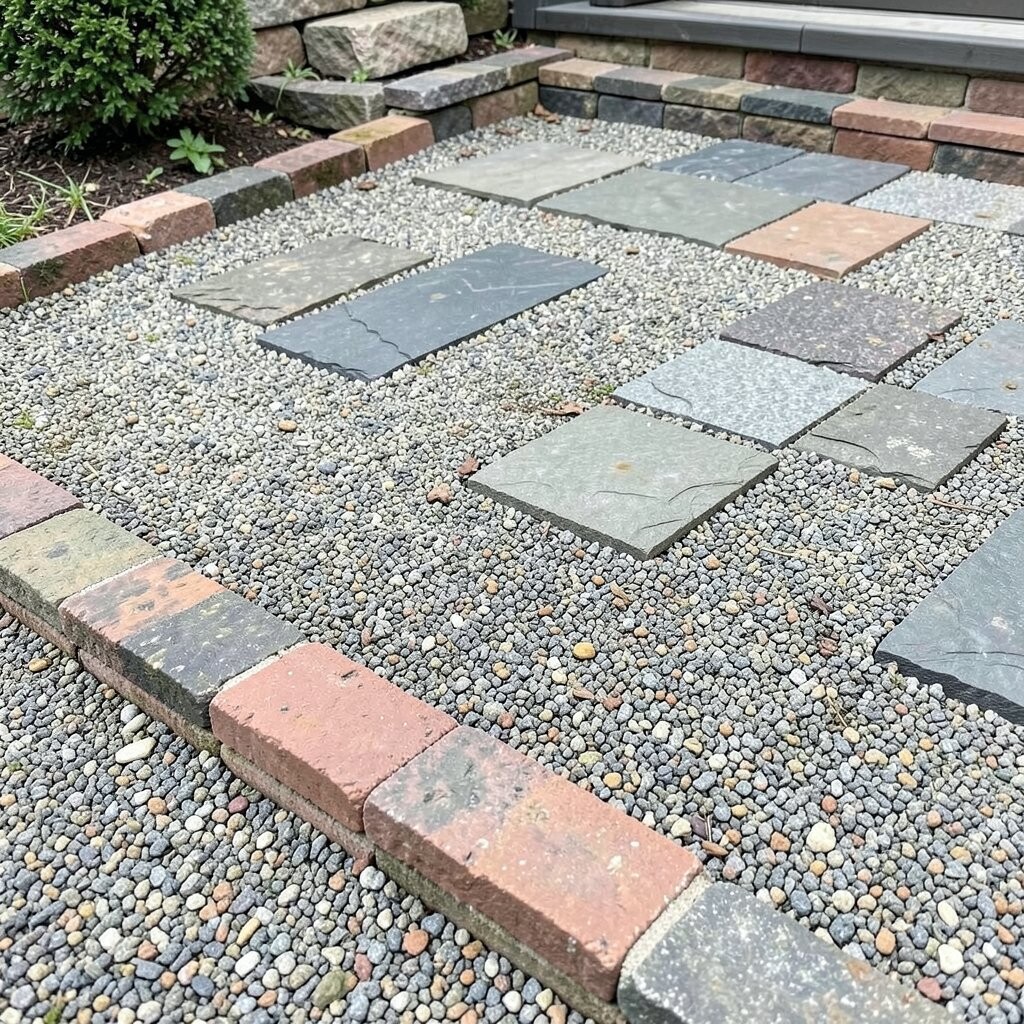
Use repurposed brick, slate, or old pavers for your border. Even small pieces can add character and make your patio feel one-of-a-kind.
This uniqueness is a big selling point because it tells a story through color and texture. Gravel inside stays flexible, while the edge holds the shape and reduces spreading.
Before installing, lay the pieces out on the ground to see how they fit. Keep the top edges level so you don’t create wobble spots or gaps where gravel leaks out.
Cost can be lower when you reuse materials, but you may spend time sorting and cleaning. Personalize by mixing shapes in a repeating pattern, or use one material type for a cleaner, modern look.