
Bright tea photos feel warm before you even take a sip. The secret is in how you stage light, color, and small details.
1. Sunlit Window Tea Tray

Place a light-colored tray near a window and let morning sun do the heavy lifting. Keep the tea set slightly angled so the highlights look lively on the glass and ceramic.
Use a simple tea cup, a spoon, and a small dish of biscuits for visual balance. For extra brightness, wipe the glass or kettle so smudges don’t dull the scene. If you want softer shadows, move the set a few inches farther from the direct sun.
2. White Background With Pops of Color

Use a clean white surface and add one bold color element, like orange citrus slices or a green tea tin. The contrast makes the tea look clearer and the steam feel more “visible.”
Arrange leaves or tea bags diagonally so your eye has a path to follow. Try adding a bright linen napkin underneath the cup for a quick color upgrade.
For cost, you can use inexpensive craft paper as the backdrop and fruit you already have at home. Keep props minimal so the tea stays the star of the photo.
3. Glass Teapot on a Reflective Tile

Set a clear glass teapot on a glossy tile to catch shiny reflections. The mirror-like look makes even basic tea accessories feel fancy.
Choose a tea color that shows well, like light green, golden oolong, or amber black tea. Add one or two tea leaves near the rim so the “tea story” feels real.
Angle the camera slightly from above to show both the pour angle and the reflection. If reflections get too strong, use a sheer curtain to soften the light.
It’s a low-cost setup because tiles are easy to find, and glassware can be thrifted. Just avoid dirty fingerprints on the teapot—clean surfaces are what sell the brightness.
4. Pastel Tablecloth With Matching Cup

Drape a pastel tablecloth and choose a cup that matches one of the pastel tones. This creates a calm, bright vibe that feels like a cozy café without overdoing it.
Layer a second fabric strip under the cup, like pale pink or light mint, to add depth. Keep everything in the same color family so the photo looks tidy and bright.
5. Tea and Citrus Rings for Fresh Highlights

Slice a lemon or orange into thin rings and let them frame the tea cup. The bright fruit tones bounce light around the scene and make photos feel crisp.
Use a small spoon or strainer next to the cup so the tea setup looks practical, not staged. If you’re photographing iced tea, add a few ice cubes in a clear glass for extra sparkle.
For personalization, try different fruit colors across seasons, like grapefruit in winter or lime in summer. Keep the rings slightly dried on the edges so they don’t look watery in pictures.
6. Overhead “Flat Lay” Tea Corner

Photograph from directly above to make your tea display look clean and organized. Flat lays work great for showing multiple items in one bright frame.
Spread tea bags, a small tin, and a folded napkin in a gentle arc around the cup. Add one textured element, like a woven coaster, to prevent the image from looking flat.
Set a bright background behind everything, like kraft paper or light cardstock. If shadows hide details, raise the light slightly and use a diffuser to soften the glare.
7. Steam in the Spotlight (Warm-Light Timing)

Time your photo right after pouring so the steam catches the light. A warm, bright moment makes the scene feel inviting and alive.
Use a darker cup or a darker table area as a subtle contrast, so steam shows up better. Keep your camera settings steady so steam patterns don’t smear in the image.
Try shooting in short bursts, since steam fades quickly. If the air is too still, lightly warm the cup first to encourage a steady plume.
8. Wooden Board and Minimal Herbs

Choose a light wooden board and add fresh herbs like mint or rosemary for a bright, natural feel. Wood gives warmth, while herbs add color and texture.
Place the teacup off-center and tuck herb sprigs near the tea, not on top of it. This keeps the tea readable and lets the props support the main subject.
Use natural daylight and avoid harsh noon sun to prevent overly dark shadows. For a quick upgrade, add a thin strip of parchment under the cup.
Thrift a simple wooden tray to save money, or reuse one from your kitchen. Personalize the herbs based on your tea type, like mint for green tea and chamomile flowers for herbal blends.
9. Bold Teacups With a Patterned Runner
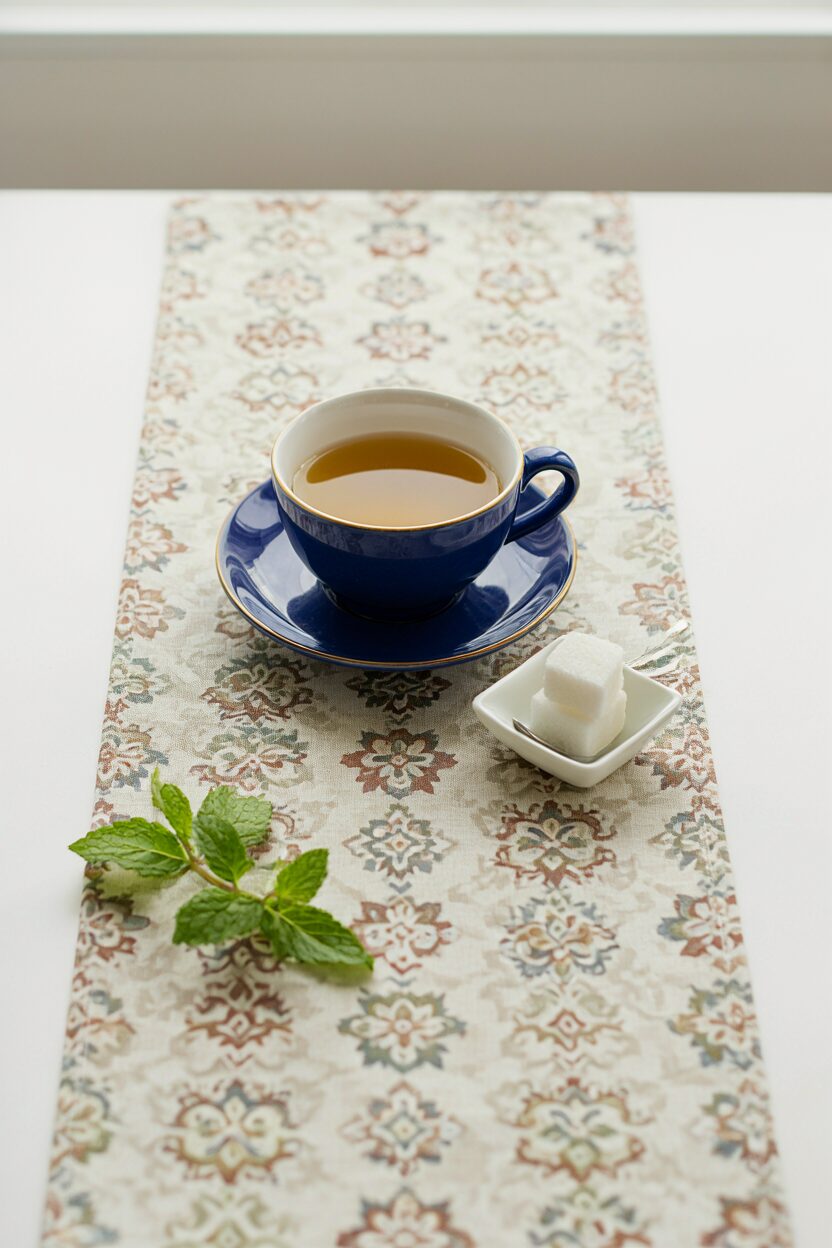
Use a patterned table runner and pick a teacup that echoes one color from the pattern. This makes the photo pop while keeping the scene cohesive.
Keep the tea set near the center so the pattern frames rather than distracts. Add one small prop, such as a sugar cube dish, to round out the composition.
For bright photos, use bright daylight and avoid clutter that makes the image busy. If your pattern is busy, simplify the tea items so the viewer doesn’t feel overwhelmed.
10. Tea Subscription Box Style (Unboxing Look)

Arrange tea packets or a small tea subscription box near a cup to create an “unboxing” vibe. Bright colors on packaging naturally bring energy into your photo.
Use a neutral background and keep the cup slightly forward so it feels like the tea is ready to brew. Add a small card or measuring spoon to tell the story.
If you want cost control, repurpose boxes you already have and print simple labels at home. For personalization, photograph teas in color groupings, like all citrus blends together or all floral blends together.
11. Iced Tea With Clear Ice and Straw

For bright, clean visuals, photograph iced tea with clear ice cubes. The transparency makes the scene look fresh and modern.
Place a crisp straw and a lemon wedge so light can bounce through the glass. Choose a light plate or napkin to keep the background airy.
Use a fast shutter and avoid foggy glass by wiping it right before the shot. If your ice looks cloudy, chill the glass longer and handle ice with clean tools.
Cost is low since you can make clear ice with a simple freezer setup. Personalize by using colored straws that match the tea flavor, like green for minty blends.
12. Seasonal Flowers Around the Cup

Place a small bouquet or single stem near the cup to give your tea display a bright, seasonal feel. Fresh color accents make the photo look like a moment, not just a product.
Keep the flowers slightly out of focus by using the closest focus point on your cup. This helps the tea remain the hero while the flowers add charm.
13. Tea Tasting Flight on Small Stands
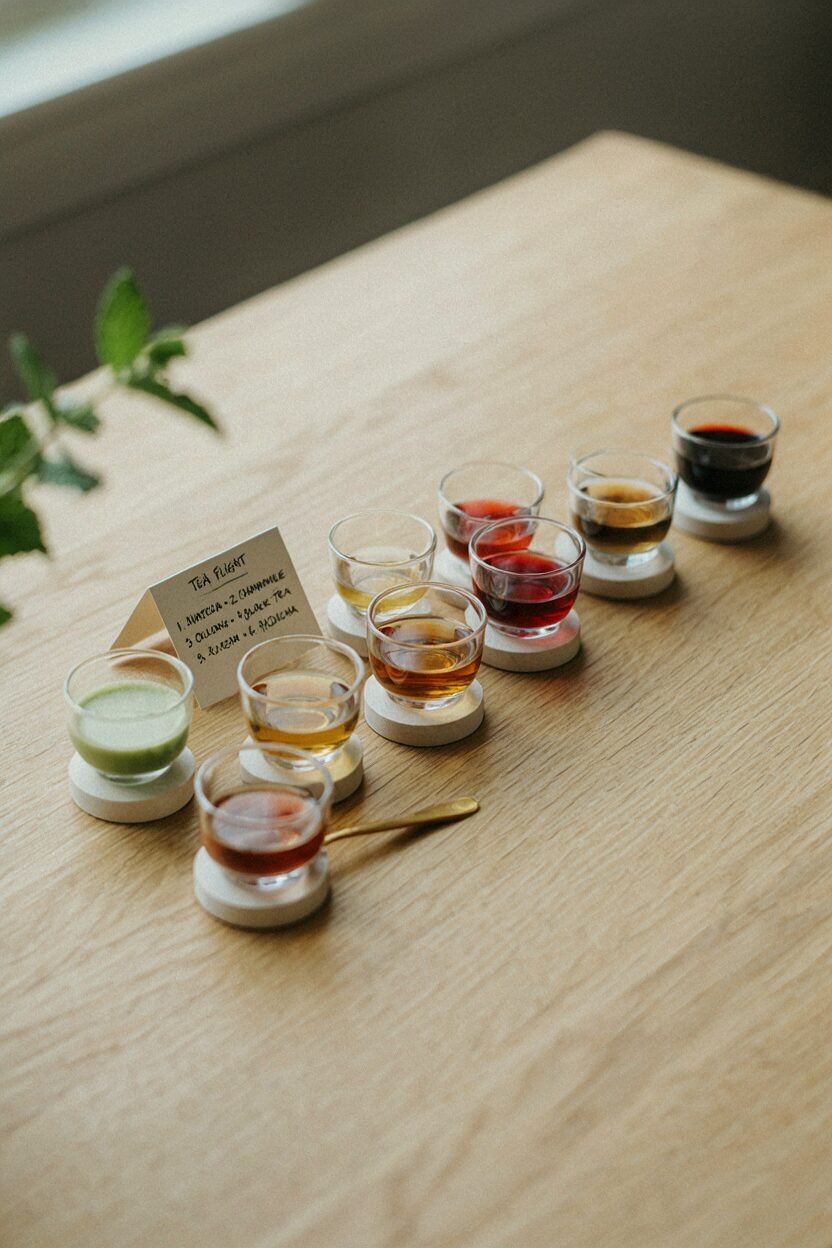
Photograph several tiny cups or tasting glasses together to create a “flight” look. Multiple tones of tea create visual variety and keep the image bright and interesting.
Use small stands or stackable plates to add height and dimension. Arrange the cups in order from light to dark so the viewer can follow the story.
For practical tips, wipe each glass dry so condensation doesn’t blur the edges. Add a tiny spoon or tasting note card for a thoughtful touch.
14. Color-Blocked Background With One Tea Color

Choose two background colors and separate them with a clean line behind the tea. For example, pale blue and white can make golden oolong look extra warm.
Pick one tea color to highlight, then match the smallest prop to it, like a brass spoon for amber tea or a green leaf for green tea. Keep the cup centered on the “highlight” color for maximum brightness.
15. Hanging Teabags and Vertical Composition

Create a vertical look by suspending teabags from a small hook above the cup. This adds movement and makes the shot feel stylish without needing expensive gear.
Light from the side helps the teabags look dimensional and bright. Use a clean backdrop so the suspended elements don’t blend into clutter.
For a low-cost setup, use a thin string and a clamp to hold the teabags. Personalize by mixing tea bag designs or tag colors for a more playful display.
16. Ceramic Cup With Handmade Texture and Sprinkles

Style your ceramic cup next to small handmade textures, like woven coasters or linen with visible grain. These details catch light in a gentle way and make the photo feel tactile.
Add a few “sprinkles” of crushed tea leaves or sugar crystals around the base for sparkle. Just use a light hand so it looks neat and not messy.
Consider cost by making your own tea-leaf bits from leftover brewing. Personalize with spice sprinkles that match the flavor, like cinnamon stick pieces for chai blends.
17. Tea on a Bright Bookshelf Shelf (Layered Props)

Stage your tea on a small shelf or thick book surface for built-in texture. Background items like stacked books can create depth while staying bright if the colors are light.
Choose one theme, such as “cozy kitchen” or “modern minimal,” and keep the props aligned with that style. A light lamp nearby can brighten the scene without creating harsh glare.
If the shelf is dark, add a white card behind the cup to bounce light back. For personalization, photograph your tea with your favorite mugs or a consistent color theme across sessions.
18. Chalkboard Edge and High-Key Clean Style

Use a chalkboard or dark slate only as an accent edge, then keep the main background light. This “high-key” contrast makes the cup and tea look crisp and bright.
Place a small piece of white paper directly behind the cup to reflect light toward the lens. Add one tiny detail like a cinnamon stick or a tea bag label to make the scene feel intentional.
Cost stays low because chalkboards can be DIY, and white paper is easy to replace. Personalize by writing the tea name in chalk right before shooting so the text looks fresh.