Halloween is the perfect time to embrace all things creepy and deliciously eerie. Imagine a dessert table filled with cakes that not only taste amazing but also look like they crawled right out of a haunted kitchen.
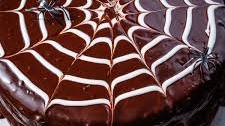
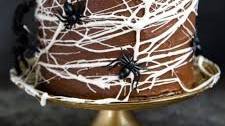
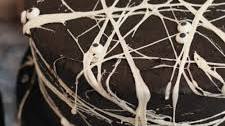
Rich and decadent, this cake combines the deep flavor of chocolate with the visual appeal of a spider web made from luscious white chocolate. The cake itself is a moist chocolate sponge, smothered in a velvety chocolate ganache.
What makes this recipe stand out is the intricate spider web design on top, crafted with precision using melted white chocolate. As the white chocolate hardens, it creates a stunning contrast against the dark, glossy ganache. This cake not only promises a delightful taste but also a show-stopping appearance that will have your guests reaching for their cameras before their forks.
It’s not just about the looks, though. The combination of bittersweet chocolate and a hint of vanilla in the sponge creates a complex flavor profile that’s both rich and satisfying. Paired with the creamy ganache and the sweetness of the white chocolate, every bite is a perfectly balanced treat.
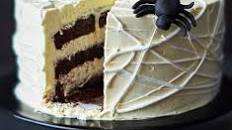
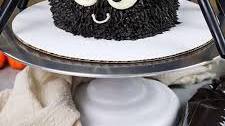
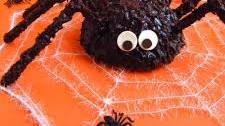
This cake may look like a simple vanilla delight from the outside, but wait until you cut it open! Inside, a hidden surprise awaits: a gooey chocolate spider nestled within the fluffy vanilla layers. The light and airy vanilla cake is complemented by a creamy vanilla frosting that adds just the right amount of sweetness.
What makes this cake a favorite at Halloween parties is the element of surprise. As guests slice into the cake, they discover the chocolate spider, which is made from a rich chocolate truffle mixture. It’s not just a visual treat but also a taste sensation, with the smoothness of the truffle contrasting beautifully against the lightness of the cake.
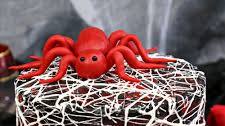
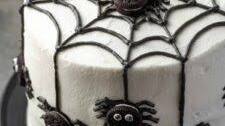
Red velvet lovers, rejoice! This cake offers a spooky twist on the classic favorite. The rich, red hue of the cake makes it perfect for Halloween, while the cream cheese frosting provides a tangy contrast that enhances every bite.
The magic of this cake lies in the decoration. Black fondant spiders creep across the surface, their legs delicately crafted to look eerily realistic. A drizzle of dark chocolate sauce adds an extra touch of decadence, making each slice a feast for the eyes as well as the palate.
The combination of the slightly cocoa-flavored red velvet with the creamy, slightly tart frosting is a match made in heaven. It’s a cake that’s as delightful to eat as it is to look at, making it a must-have for any Halloween celebration.
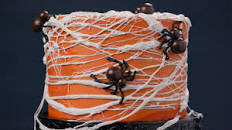
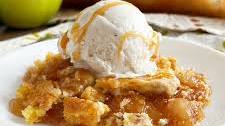
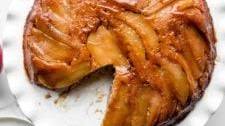
Capture the essence of fall with this caramel apple spider cake. The cake is infused with fresh apple chunks and a hint of cinnamon, creating a warm, comforting flavor that’s perfect for autumn. It’s topped with a rich caramel glaze that drips enticingly down the sides.
This cake’s crowning glory is the adorable mini chocolate spiders that sit atop the caramel glaze. Made from chocolate truffles and pretzel sticks for legs, these little critters add a touch of whimsy to the cake. The combination of tart apple, sweet caramel, and chocolate makes for an unforgettable dessert experience.
When making cakes with intricate designs like spider webs, ensure your ganache or frosting isn’t too runny; it should be firm enough to hold the design. A slightly chilled frosting makes it easier to pipe or drizzle without losing shape.
Master the Spider Craft
For realistic chocolate spiders, use a mold or shape them by hand when the truffle mixture is slightly warm. Add tiny details, like eyes or textured legs, with a toothpick dipped in melted chocolate for that extra touch of realism.
Chill for Precision
Before adding finishing touches like spider webs or caramel drizzle, chill the cake for about 20 minutes. This helps set the frosting and provides a sturdy surface for your designs, ensuring they stay sharp and defined.