
Wood beams can make any room feel instantly warm and “put together.” Affordable options let you get the look without emptying your wallet.
1. Faux Beams With Peel-and-Stick Planks

Peel-and-stick wood-look planks can mimic the vibe of real beams with very little mess. They are perfect when you want the look fast, clean, and budget-friendly.
Choose a plank width that matches the beam scale of your ceiling or wall. Line them up with painter’s tape first so the layout feels straight and intentional. For an even more realistic finish, add a matching faux “beam cap” trim at the edges and paint it a slightly darker shade for depth.
2. Reclaimed Beam Offcuts as Accent Cradles

Reclaimed beam offcuts bring character you can’t buy in a box store. Each piece often shows tiny dents, knots, and grain lines that make your space feel lived-in.
Use the wood as small accent cradles under shelves, around a TV wall edge, or as vertical “beam” accents at corners. Because offcuts are naturally irregular, you can highlight that beauty instead of trying to force perfect symmetry. Keep them protected with a clear matte seal so fingerprints and sunlight won’t dull the finish.
For cost control, shop for bundles of shorter lengths and plan your design around spacing. If your room is modern, sand just the roughest spots and stain lightly to keep the texture visible. In a farmhouse style, skip heavy sanding and let the patina do the talking.
3. Lightweight MDF Beams Painted to Match

Lightweight MDF beams are an easy way to get a “real beam” silhouette without heavy lifting. You can also paint them to match your existing trim, which makes them look custom.
Pick a style with a clean profile and install it with screws into studs or a solid backing. Fill seams with wood filler, sand smooth, and then paint with a primer plus two finish coats. This helps you avoid the “crafty” look and gives a crisp, finished appearance.
If you want warmth, choose a soft white, greige, or honey stain tone instead of a stark bright white. To personalize, lightly distress the edges with sandpaper for a subtle vintage feel. Budget-wise, MDF is usually cheaper than real wood, and painting lets you dial in color so you don’t need to buy multiple materials.
4. Clear-Coat Stained Closet or Pantry Beams

Don’t overlook the spaces people rush past, like closets and pantries. Adding a few stained “beam” accents can turn storage into a stylish feature.
Use short lengths of inexpensive lumber or beam-look trim and stain it with the same color you use on doors or shelves. Apply a clear protective topcoat so the wood stays easy to wipe down. Keep the beam pattern simple—two or three runs max—so the area still feels clean and practical.
5. Ceiling Beam Grid With Budget-Friendly 2x2s

A simple grid made from small, affordable 2×2 pieces can create that classic ceiling beam look. The secret is planning the spacing so the lines feel balanced.
Measure your ceiling width and aim for even spacing between beams. Install a ledger at the ceiling line and secure your framing into joists when possible. Paint the wood in a satin finish or stain it, then finish with caulk where it meets the ceiling for a neat seam.
For personalization, choose thicker-looking beams by layering two strips side by side. If your room is low-ceiling, keep the grid shallower or use a lighter stain to avoid visual heaviness. This approach stays cost-conscious while still looking architectural.
6. Routed Wooden “Beam” Veneer for Feature Walls

Wood veneer with routed channels can imitate real beams while staying light on cost. It’s especially great for a single feature wall where you want impact without a big installation.
Apply the veneer over a sturdy backer panel and align the “beam” grooves with a level line. Use a matching stain or tinted finish so the color blends smoothly across panels. Seal it well so the surface stays durable for everyday life.
Try a vertical orientation for tall rooms, or use a horizontal layout for a cozy, cabin-like feel. If your style is modern, keep the stain light and the finish satin for a clean look. Budget-wise, veneer gives you the look of wood grain with less material than full beams.
7. Narrow Real Pine Beams With Stain and Matte Finish

Real pine beams can be surprisingly affordable, especially if you choose narrower widths. They bring a natural softness and fragrance that painted faux materials can’t match.
Look for straight boards, then cut them into beam-length sections before installation. Stain them with a tone that fits your room, like warm oak, driftwood, or caramel brown. Finish with a matte topcoat to keep the wood from looking shiny or plastic.
For practical installation, pre-drill holes to prevent splitting and anchor into studs. Add simple end caps to hide cut ends and create a stronger beam silhouette. This is a great option when you want real texture and you’re careful about material selection.
8. Reversible Stain-Grade Beams for Easy Color Changes
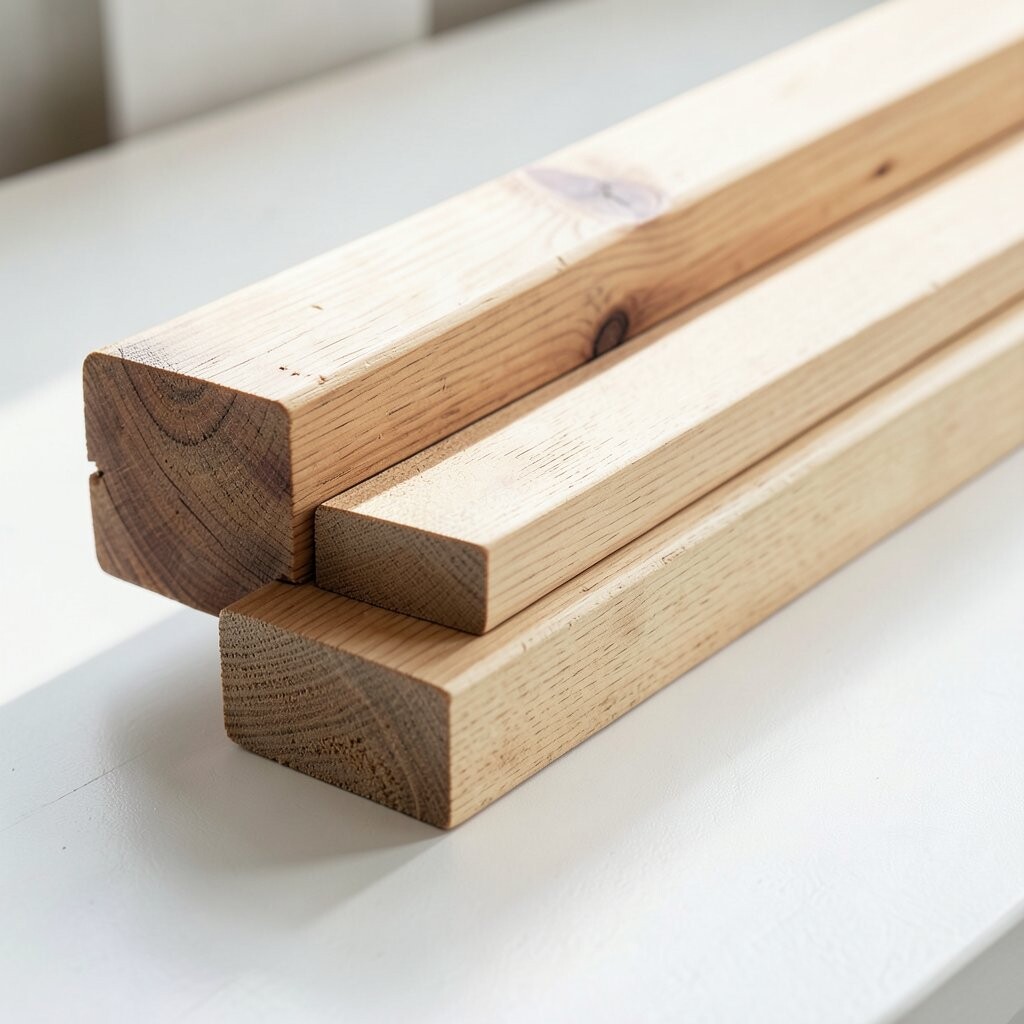
If you love changing your style, consider stain-grade beams that take color evenly. Some woods accept stain beautifully, so you can refresh the room later without replacing everything.
Choose a mid-tone base and then test stain shades on scrap pieces from the same batch. Apply evenly and use a rag technique to blend edges so the beams look uniform across runs. A breathable clear coat helps keep the color looking fresh.
To make it unique, pair a slightly darker beam color with lighter wall paint for a layered look. Keep cost in check by buying stain-ready lumber in bulk lengths and cutting them to plan. This approach suits renters too, because you can often install in a way that’s removable with minimal damage.
In current trends, warm woods with soft contrast are staying popular, so you’ll likely love how this looks for years.
9. Barn-Style Half-Beams on Upper Wall Sections

Barn-style half-beams add charm without covering too much wall space. They create that “historic” look while staying light and airy.
Mount the beams in the upper third of the wall, just under the ceiling line. Use a consistent spacing and keep the lines aligned so the design feels intentional. For best results, caulk the edges and paint the wall behind the beam lines in a matching shade.
Unique personalization comes from choosing a beam profile that feels chunky or slim. A chunky profile reads rustic, while a slimmer one feels modern-farmhouse. Cost-wise, half-beams use less material, which helps your budget while still delivering strong visual impact.
If you have crown molding, tuck the half-beams to complement it so everything looks like part of the same system.
10. Beam-Look Wrap Around a Kitchen Hood

A kitchen hood is a natural “spotlight” in the room, so it’s a smart place to add beam style. Even a few beam touches can make the whole cooking area feel custom.
Use inexpensive trim boards to build a simple frame around the hood and add faux beam lines inside the frame. Stain or paint the wood so it matches your cabinets or floating shelves. Keep moisture in mind by using a water-resistant clear coat on exposed wood surfaces.
11. Stretched Corner Beams for Instant Architectural Lines

Corner beams can give the illusion of a more defined structure, even in small rooms. They add lines that guide the eye upward and make walls feel more structured.
Install short beam segments at each corner, then connect them with a matching trim strip if desired. Use a level and a tape measure so the angles look crisp. For a polished look, paint the beams in the same color family as your ceiling trim.
This idea is unique because it doesn’t need a full ceiling plan. You can personalize by using a slightly different finish on the beams, like matte wood on a semi-gloss wall. If cost is tight, focus your wood spend on just four corners rather than building an entire grid.
12. Wood Beam Shelf Supports With Hidden Hardware

Instead of buying fancy brackets, use wood beam pieces as shelf supports. It turns a simple shelf into a strong design statement without expensive hardware.
Choose two beam-length supports and cut them so they sit flush against the wall. Sand the edges smoothly and stain or paint so the supports look like they belong to the room. For practicality, use hidden mounting plates or internal brackets so the design stays clean.
To keep it safe, check shelf load ratings and anchor into studs. This is a trend-friendly look because built-ins and custom-style shelving stay popular. Budget-wise, lumber offcuts can work, especially for small shelves in hallways and kitchens.
For personalization, add a subtle notch or decorative end cut pattern that matches your door hardware style.
13. Wood Beams as TV Wall Framing for Cozy Contrast

Your TV wall can feel warmer and more upscale with wood beam framing. It creates a “picture” around the media setup and makes the rest of the wall feel purposeful.
Build a simple rectangular or square frame using lightweight boards, then add beam-like accents across the opening. Stain the wood to contrast with your wall color, such as walnut tones against light paint. Seal it with a durable topcoat so cleaning the screen area doesn’t damage the wood.
Unique touches include adding two wider beam lines that run behind the TV and smaller “crossbeam” pieces for texture. Keep cost manageable by using thinner boards and focusing on the visible face. If you want extra realism, shadow-gap trim between the wood and wall can make the beams look deeper.
This works especially well in current cozy-living trends where warm wood and minimal clutter go together.
14. Whitewashed Beam Accents With Simple Brushwork

Whitewashed beams are airy and forgiving, which makes them ideal for affordable materials. The finish hides minor imperfections while still showing wood grain.
Use a light stain or watered-down white paint, then apply with a brush and wipe back for a natural effect. Layer thin coats until the color looks right rather than trying to get it perfect in one go. Seal with a clear protective coat so it stays wipeable.
15. Outdoor-Safe Beams for Covered Patios and Entryways

If your beams will be outdoors, plan for weather from day one. Choosing outdoor-rated wood-look materials or properly treated lumber helps the look last.
For covered entries, use pressure-treated wood or exterior-rated engineered beams, then stain or paint for color consistency. Seal every cut edge, because edges soak up water faster than faces. Add simple drip caps on top surfaces to reduce moisture pooling.
To keep this affordable, limit wood beams to the most visible sections like above the door and along the top of a small porch span. Personalize with hardware finishes that match your lighting, like black fixtures or brushed metal. Right now, warm neutral tones and low-sheen protective finishes are very popular for outdoor “indoor-outdoor” spaces.