
Open drawers can feel like a tiny mess explosion. A few low-cost upgrades can make everything look calm and easy.
1. Stackable Shoe Boxes as Drawer Cubes

Stackable shoe boxes turn one drawer into several tidy zones. They are light, cheap, and easy to fit around your items.
Pick boxes that slide smoothly and do not wobble. Label each box with a simple marker label so you remember where things go. For a cleaner look, wrap the outside with fabric scraps or contact paper and match colors to the drawer area.
2. DIY Fabric Drawer Dividers With Old Towels

Old towels can become soft dividers that protect fragile items. They also add a cozy, less “hardware store” vibe.
Cut towel strips to your drawer height and braid or knot the ends for a finished feel. Use Velcro dots or thin adhesive strips to hold the divider in place. If you want a snug grid, measure the width first and line up the strips evenly across the drawer.
Try separating categories like chargers, scarves, or cleaning tools so everything has a home. Because fabric stretches slightly, it works well for irregular items. You can also rotate towel colors by season for a fun personalization touch.
3. Clear Plastic Organizers From Discount Bins

Clear organizers make it easy to see what you have. That means fewer “where is it?” moments.
Choose small, stackable bins that match your drawer size. Place similar items together, like socks, hair accessories, or craft supplies, so the contents stay calm. If a bin is slightly too big, add a folded paperboard sheet to stop it from sliding.
One unique advantage is that you can spot missing items quickly. It also helps you avoid buying duplicates since you can check at a glance. For trends, transparent storage is popular because it supports visual organization and quick daily routines.
To keep costs low, look for multipacks at discount home stores or reuse containers you already own. Wash them with mild soap and let them dry fully before organizing.
4. Adjustable Drawer Trays Using Expanding Tension Rods

Expanding tension rods can create custom sections inside a drawer. They are especially useful when your items vary in size.
Set the rods horizontally or vertically so smaller items fit between them. Cover rod ends with felt tape so nothing scratches. This approach is unique because you can reconfigure it whenever you switch what you store.
5. Repurpose Kitchen Utensil Trays for Small Items

Utensil trays are built for sorting, so they work great in drawers. They keep tiny pieces from turning into one tangled pile.
Use one tray for things like rubber bands, twist ties, pens, or scissors. If your drawer is deeper, stack two trays with a spacer board so items do not sink. For a better fit, trim the tray base with careful measurement and a saw or strong scissors if the material allows.
This idea stands out because the compartments are usually already the right shape for everyday clutter. A practical tip is to keep the “grab zone” closest to your most-used side. When it comes to cost, you can often find a utensil tray for the price of a coffee add-on, especially during sales.
6. Corrugated Cardboard Dividers for Budget Grids

Corrugated cardboard dividers are one of the cheapest ways to create structure. They are sturdy enough for many drawer items and easy to cut.
Cut panels to form a grid, then wrap them in paper so they look neat. Tape the seams with strong clear tape to prevent sagging. Personalize by printing small labels or using craft paint to match your drawer style.
One benefit is that you can rebuild the grid as your needs change. If you store lightweight items like office supplies or makeup brushes, this works especially well. For trend support, handmade “visible organizing” is popular because it feels creative rather than clinical.
7. Use Mason Jar Lids and Cup Hooks for Drawer Storage
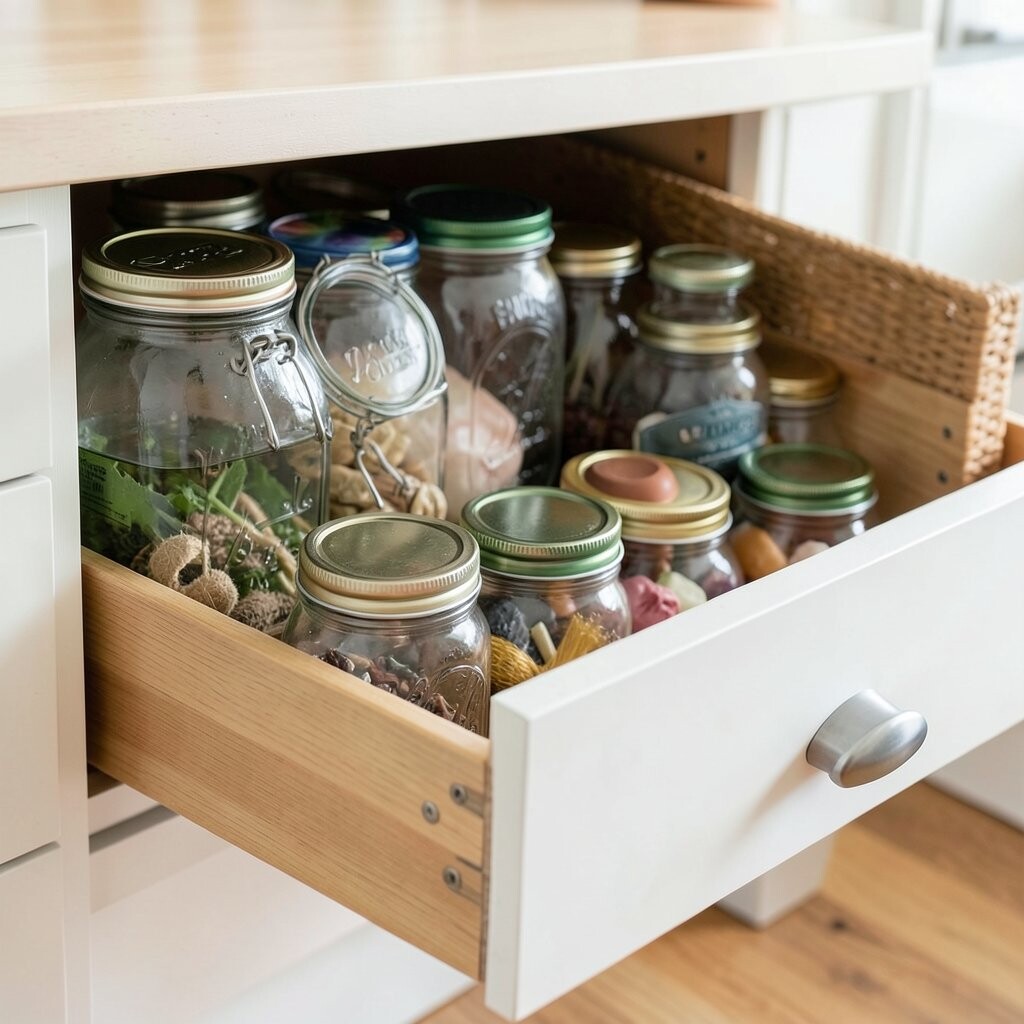
Mason jar lids and small cup hooks can help you store odd shapes neatly. The setup turns a drawer into organized stations for tools and accessories.
Attach hooks to a thin board or place lids as small rings for cables. For example, wrap each cable once, then hang it through a lid ring so cords do not disappear. Keep hardware like jar lids, rubber gaskets, or screws in one small compartment so they are always together.
This method is unique because it uses “hang logic” instead of only flat compartments. It also reduces tangles quickly, which makes daily routines smoother. Cost stays low if you reuse jars from pantry storage.
8. Add Felt Liner and Simple Bar Stops

Felt drawer liners make items glide less and slide around less. They also add a soft look that feels clean and cared for.
Cut felt to drawer size and press it down firmly. Then add small bar stops using thin wood strips or folded cardstock to limit how far items can move. This is useful when you have categories like skincare, small bottles, or tools that you want to face the same direction.
For personalization, choose liner colors that match the room and create a consistent “theme” across drawers. The benefit is that even a simple layout feels more intentional. As for cost, you can buy felt rolls for a low price, or reuse old craft felt.
A current trend is mixing soft materials with minimal organizers, which keeps drawers from looking too “plastic.” This approach gives you that softer, homey vibe.
9. Store By Height With Folded Paperboard Channels

Folded paperboard can act like channels that separate items by height. It is a clever way to reduce clutter without buying many tools.
Create U-shaped supports by folding sturdy cardboard and sliding them into place. Put taller items in one channel and flatter items in another so everything stays upright. For best results, measure the drawer width and test one channel before building the full set.
This works especially well for items like makeup palettes, craft blocks, or folders that tend to lean. A practical tip is to keep the channel spacing consistent so you can “reset” the drawer in seconds. Cost is minimal, since cardboard can be salvaged from shipping boxes.
If you want a more polished look, cover the paperboard with wrapping paper or scrapbook paper. That small step makes the organizer feel intentional. Personalization also helps you train yourself to return items to the same spot.
10. Magnetic Tape Strips for Metal Tools in Drawers

Magnetic tape can tame metal items that like to scatter. It also keeps small tools from getting lost at the bottom.
Attach thin magnetic strips to the side or base of a drawer and place metal tools directly on them. Use felt or rubber padding under the strip if it feels too strong or could scratch. This is unique because it turns a drawer wall into a storage surface without extra compartments.
Keep a “starter set” at the top for what you use most, like scissors, tweezers, or small measuring tools. For cost, magnetic strips are usually affordable, and many come in bargain packs. A trend you may notice is vertical and wall-based organizing, which makes drawers feel more spacious.
11. Zip Bags and Labeled Bundles for Cables and Accessories

Zip bags are simple, but they can be amazingly effective. They protect small items and help you group them by purpose.
Sort cables, chargers, and small adapters into separate bags, then label each one clearly. Place the bags upright in a larger tray or tuck them side by side in the drawer. To personalize, use colored labels for categories like work, home, or travel.
This approach stands out because it keeps dust and tangles under control. A practical tip is to keep a “spare” bag for batteries or backup accessories so you do not mix them up. When you think about cost, you might already have bags at home, and discount packs make it even cheaper.
12. Sliding Drawer Shelf With Scrap Wood and Brackets

A sliding shelf can double the usable space in a deep drawer. Even a small platform helps you separate layers and reduce mess.
Use scrap wood for the shelf surface and basic brackets or drawer slides to hold it level. Add a lip at the front so items do not slide off when you pull the drawer. This is unique because you are building vertical storage without buying a full organizer system.
Set one shelf for everyday items and another for backups like extra batteries or seasonal accessories. Cost depends on what you already have, but scrap wood and reused hardware can keep it budget-friendly. For personalization, sand and paint the shelf to match your room, or leave it natural for a warm look.