
Your living space can look brand-new without buying brand-new things. A few smart furniture makeovers can bring fresh color, texture, and comfort to your everyday routine.
1. Chalk-Paint Nightstand With Soft Matte Glow

This nightstand looks calm and cozy, like it belongs in a bright boutique hotel room. The matte finish hides small scuffs, so it keeps looking neat even with daily use.
Start by cleaning the surface well and sanding lightly so paint sticks. Use a wax or topcoat made for chalk paint to protect against fingerprints and ring marks. For a personal touch, add a new knob in brushed brass or a simple ceramic pull that matches your lamp color.
2. Color-Blocked Dresser With Bold Drawer Contrast
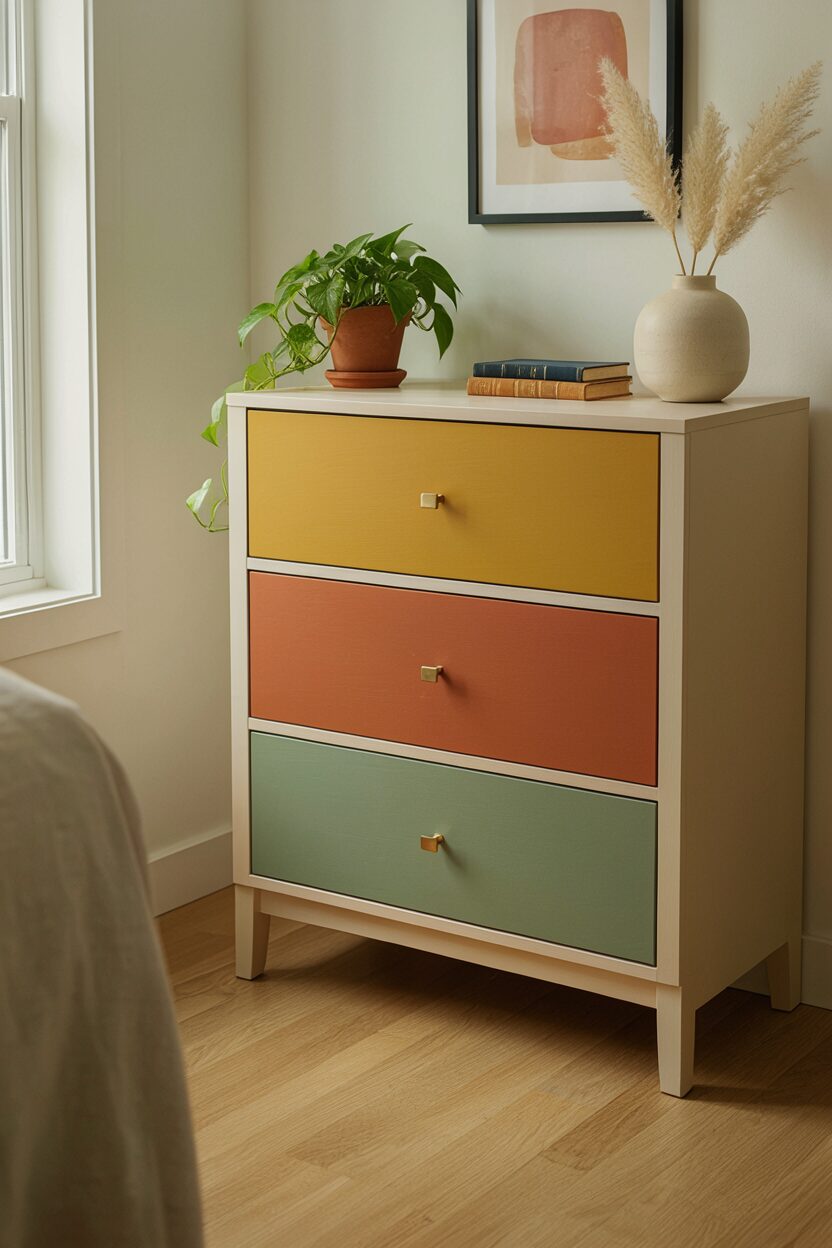
The dresser now feels playful, because each drawer color pops against the main body. You instantly get that “designed on purpose” look without repainting everything the same shade.
Pick two or three colors that already show up in your room, like pillows, wall art, or a rug. Tape off clean lines and paint thin layers, letting each coat dry fully before adding the next color. If you want extra crisp edges, remove the tape while the paint is still slightly tacky.
To keep the finish durable, seal the whole piece with a protective topcoat, especially on drawer fronts. This makeover is budget-friendly when you buy paint in small sample sizes for the accents. A trend right now is using one bold color for the drawer faces, then keeping the top and sides in a calm neutral.
3. Striped Entryway Bench With Fresh Stain and Warm Hardware
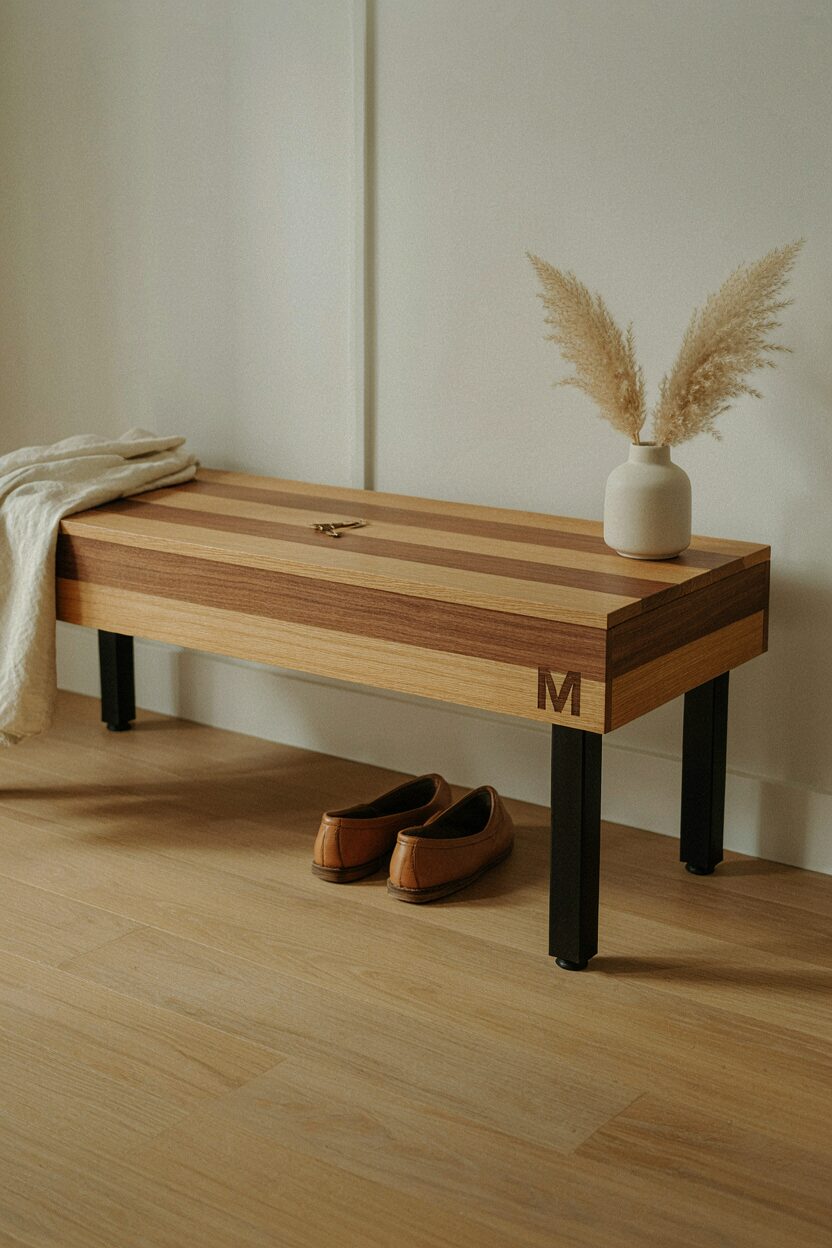
This bench looks like it belongs in a modern hallway, with a clean striping pattern that catches the light. The new stain warms up the wood tone and makes the space feel welcoming every time you walk in.
Sand until the surface feels smooth, then apply stain in long, even strokes. If you want stripes, mask sections carefully and use a brush for the edges so you don’t get bleed-through. Let everything dry overnight, then remove the tape slowly at an angle.
Swap the hardware for sturdier hooks or knobs in a finish like matte black or warm copper. Consider adding felt pads under the bench legs to protect floors and reduce scuffing. For personalization, stencil a small icon or monogram on the side panel where it won’t take over the whole look.
Cost-wise, this upgrade can stay affordable because stain and masking supplies are usually cheaper than replacing the bench. A current look is mixing warm wood with one modern dark accent, which this style nails.
4. Linen-Textured Chair Makeover With Slipcover-Like Paint

The chair now feels soft and breezy, even though it’s still sturdy. Its texture resembles fabric, which makes the room look layered and inviting.
To get this effect, choose a paint finish or texture medium that creates a light, woven look. Clean the chair, then apply a base coat and add the textured layer with a sponge or roller technique. Seal it well so the surface stays easy to wipe after spills or everyday dust.
5. Vintage Coffee Table Refinish With Clear Coat and Metal Details

The coffee table keeps its classic shape, but the finish looks brighter and more polished. Light wood highlights give it a fresh feel, while simple metal corners add a grown-up edge.
Strip or sand off old finishes carefully, then wipe away dust before applying a clear coat or light-toned stain. For metal details, use small corner braces or thin trim that lines up with the table edges. This is a great place to use a hardware kit because the pieces make installation straightforward and neat.
If you want it to look extra clean in photos, polish the metal and wipe the surface with a tack cloth before the final coat dries. Costs stay reasonable because you’re using refinishing materials instead of buying a new table. A current trend is mixing natural wood with minimal metal accents, especially in living rooms with neutral colors.
6. Ombre Shelf Backdrop With Soft Gradient Paint

This shelf looks like it has a built-in feature wall, thanks to a smooth ombre gradient behind the items. It makes books and decor appear more styled because the background no longer blends into the wall.
Choose a lighter color that matches your room and a second shade that’s slightly deeper. Paint the light base first, then blend the darker color upward using a sponge or blending brush. Work gradually and stop to check the gradient in natural light.
For practical results, use painter’s tape along shelf edges and cover nearby items during drying. Personalize it by switching the ombre color family, like sage to cream for calm or navy to sky for a more dramatic feel. Plan for cost by buying small amounts of paint for the gradient test section before committing to the full shelf back panel.
7. Bright Sideboard With Two-Tone Doors and New Pulls

The sideboard feels like a statement piece now, because the doors and base hold different tones. That contrast draws the eye and makes storage look more intentional.
Start by removing doors, cleaning thoroughly, and lightly sanding to smooth the old finish. Paint the base one solid color, then paint the door panels a complementary shade. When you reattach doors, align hinges carefully so the gaps look even and tidy.
Swap the pulls for hardware with a modern shape, like long bar handles or rounded knobs. Seal the finish to protect against daily wear, especially around handles. This makeover fits current trends that favor bold colors paired with simple, streamlined hardware.
8. Bathroom Vanity Makeover With Fresh Coat and Updated Mirror Frame

This vanity looks brighter and more spa-like, with clean lines and a finish that feels crisp. Updating the mirror frame makes the whole setup look coordinated, not just “painted.”
Use moisture-friendly paint or a bathroom-safe topcoat so the surface can handle humidity. Remove cabinet doors when possible for easier painting and smoother results. If you’re painting a mirror frame, sand lightly and coat evenly so you don’t end up with a patchy sheen.
Consider adding organizers inside drawers, like small dividers or a tray for toiletries. Choose hardware that matches faucets or lighting fixtures to keep the style consistent. Budget tips: you can often reuse existing hardware if it’s in good condition, then save money for better-quality paint.
A current trend is warm, natural tones paired with soft white walls, which helps bathrooms feel airy rather than heavy.
9. Kids’ Desk Upgrade With Chalky Top and Colorful Legs

The desk now looks fun and functional, with a writing-friendly top that invites creative projects. Fresh colored legs add energy while keeping the tabletop calmer for homework and art.
Sand the tabletop lightly, then apply a chalky finish or a paint system meant for easy writing. Seal the edges carefully so the desk is wipeable when markers or crayons get curious. Paint the legs in a bright solid color and coat them for durability.
To personalize it, add a small sticker decal or a simple growth chart label area near the drawers. You can also paint a color code on storage bins to help kids keep things organized. Cost can stay low since the main materials are paint, sealant, and basic brushes, not new furniture.
Many parents are choosing practical finishes lately because they look cute in photos but also survive daily life.
10. Dining Table Makeover With Stain Refresh and Protective Top

This dining table looks richer, with an updated stain that brings out the grain. Even small repairs blend better now, so the tabletop feels smooth and ready for meals.
Fix scratches by filling minor dents or using a wood filler that matches the tone, then sand again once dry. Apply stain in thin coats and wipe off excess so the color stays even. Finish with a protective layer like polyurethane or a water-resistant topcoat for everyday spills.
Personalize the look by sanding just enough to keep some original character while still refreshing the overall tone. When choosing color, consider whether your chairs are warm or cool in undertone so everything matches naturally. For cost, it’s often cheaper to refresh than replace, especially when the table has a solid frame.
A current trend is “friendly wood” with clear protective finishes, which keeps the table bright while still feeling natural.
11. Outdoor Planter Bench With Weather-Ready Paint

This bench looks ready for weekends outside, with a coating that handles sun and damp air. The color feels fresh, so it stands out against greenery instead of fading into the background.
Choose exterior paint rated for outdoor use, then clean the bench and remove any old peeling layers. Use a primer if the previous coating is worn or uneven. Paint with multiple thin coats so coverage is smooth rather than thick and drippy.
Personalize by stenciling small plant-themed shapes or adding a simple painted edge border. Add outdoor-safe cushions for comfort, then seal any hardware so rust doesn’t creep back. Budget-wise, exterior paint is a bit more upfront, but it helps the piece last and reduces future touch-ups.
Right now, many people love nature-inspired colors like sage, clay, and deep terracotta for outdoor spaces.
12. Cabinet Makeover With Smooth Facelift and Glassy Finish

This cabinet looks sleek, with a smooth surface that reflects light instead of looking flat. Replacing or refreshing the knobs also gives it a polished, shop-ready feel.
Degrease cabinets before sanding so the finish bonds properly, especially if they’re in a kitchen. Prime where needed, then paint with a finish that looks smoother, such as satin or semi-gloss. For the cleanest results, use a foam roller and brush only where you need extra control.
To personalize, add decorative trim along the top edges or paint the inside shelves a contrasting color. If you use glass-front doors, make sure the paint edges are crisp so the cabinet looks intentional. Cost considerations are manageable because cabinet makeovers usually rely on paint and supplies, not full replacement.
A trend you’ll see often is mixing matte cabinet colors with brighter hardware, which keeps everything from feeling dull.
13. Bed Frame Refresh With Headboard Wash and New Fabric Accents
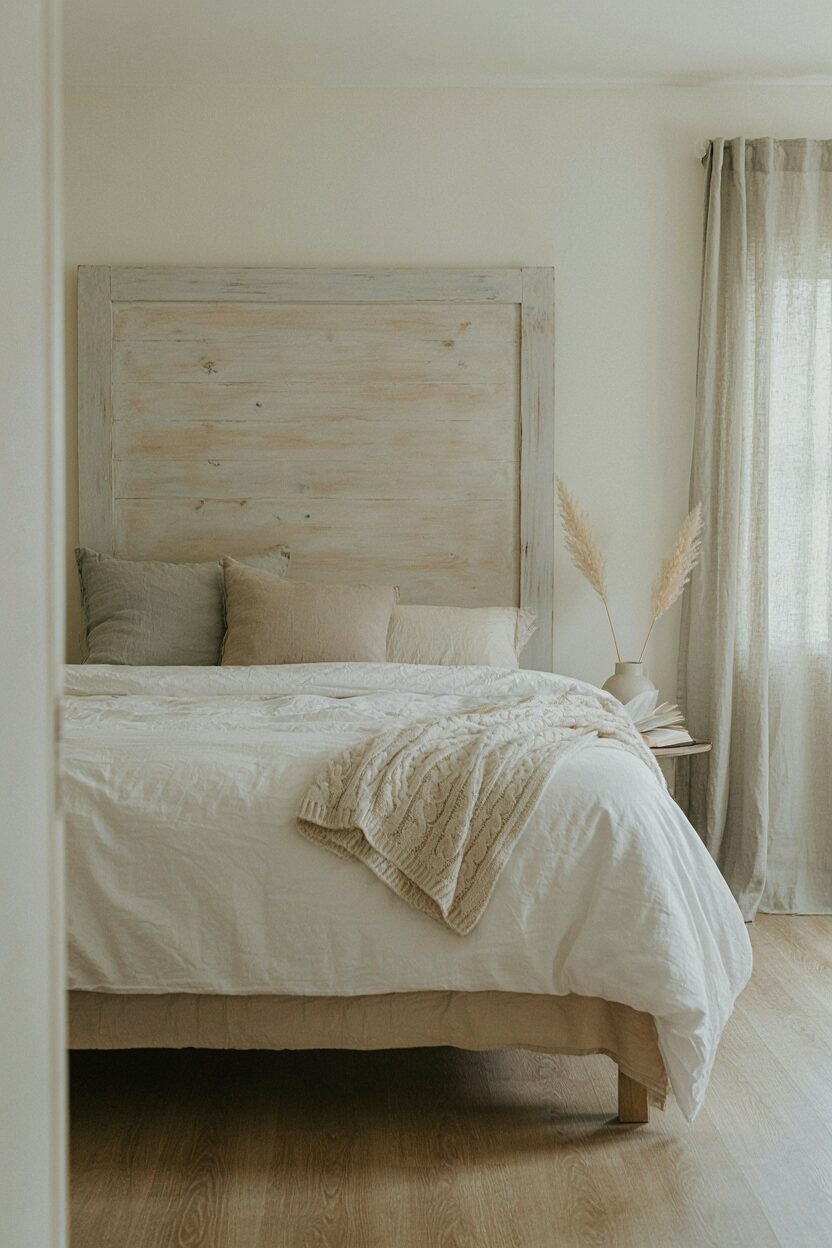
This bed looks softer and more inviting, thanks to a light wash on the headboard. Simple fabric accents make the room feel warmer without changing your whole layout.
Clean the headboard, sand lightly, and apply a diluted paint wash so the wood or old finish still peeks through. Let it dry, then add a gentle topcoat for protection against daily contact. Personalize by painting only the center panel and keeping edges in a neutral tone for a balanced look.
To make it feel complete, match the accent pillows or a throw to the new paint color. Consider cost by buying fabric accessories in clearance or using fabric you already own for a color match. This style fits a current preference for light, layered neutrals that create a calm bedroom mood.
14. Wardrobe Upgrade With Mirror-Panel Doors and Pop of Color

This wardrobe looks bigger and brighter because mirror panels bounce light around the room. A pop of color on the frame adds charm, making the piece feel custom rather than store-bought.
Measure carefully before adding mirror panels, then use hardware designed for mounting without cracking. Paint the frame first, then install the mirror panels once the finish is fully cured. For practicality, use safety film on mirrors if it suits your home and adds peace of mind.
Personalize the color by picking a shade that echoes your favorite wall art or rug pattern. Costs can be controlled by keeping the wardrobe structure and focusing spending on mirrors, paint, and mounting supplies. A fresh trend is using mirrored furniture in entryways and bedrooms to improve light and make tight spaces feel open.